paper item design

finished

[d.i.y.] super easy name placements

you’ve hit wedding crunch time and your guest list is finally finalizing. of course, this has to be at the last minute. if you can find a calligrapher at the last minute, that’s great, but you just don’t want to think about it and want to use the ol’ computer and printer for name placements. however, you still want your name placements to look great! here’s a d.i.y. for you!! (if your guest list is mostly finalized and you want to check this off your list earlier on, it doesn’t hurt to make some name placements for the “maybe”‘s and a few blank ones for last minute “i can make it!”‘s.)
結婚式の準備のラストスパート!ゲストリストが確定してやっと始められる準備の一つが席札。印刷会社に頼むのも時間とお金がかかるし、できればご家庭のパソコンとプリンターで済ませたいところ。もちろん、見た目もちゃんとしたいし・・・そこでこのDIYがオススメです!(ゲストリストがある程度確定していれば、お返事をいただいていないゲストの分も多めに作って早めにこの作業を終わらせる手もあります。また、念のため、何も書かれていない席札を多めに作っておくのもオススメです。)

LET’S START! / 始めよう!

the goods

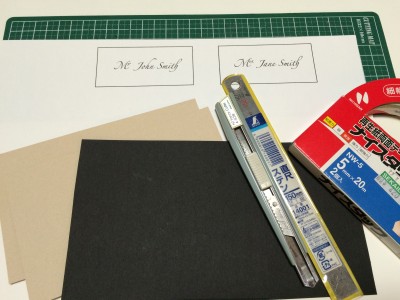
what you need / 材料:
card stock (optional: 2 types for front and back) / 厚紙または画用紙 (オプションとして表と裏で別々の紙を2種類)
printed names / 印刷されたネーム
cutting board / カッティングボード
cutter / カッター
(if available, a paper cutter will speed things up! pre-cut the names and card stock to size before hand (see below steps for sizes. front and back are the same size). / ペーパーカッターがあれば早いです!前もってネームと厚紙を人数分切り出しておくと、なお効率いいです。下記ステップに各サイズを表記しています。厚紙は、表裏共に同じサイズです。)
ruler / 定規
(i used a transparent sewing/patterning ruler (see step 1) to measure and cut simultaneously. / 透明のパターン用定規(ステップ1をご参照ください)を使うと測りながら切ることが出来て、スピードアップ出来ます。)
double stick tape / 両面テープ
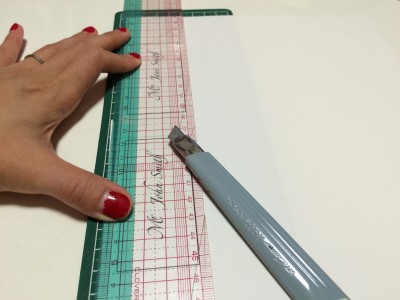
cut out  names
1. cut out the names to 8.7cm x 4.7cm/3 1/2in x 1 3/4in (i cut 5mm/1/8in around the rectangle using my patterning ruler). / 印刷されたネームを8.7cm×4.7cmに切る。(透明の定規を使って長方形の周り5mmでカットしました。)
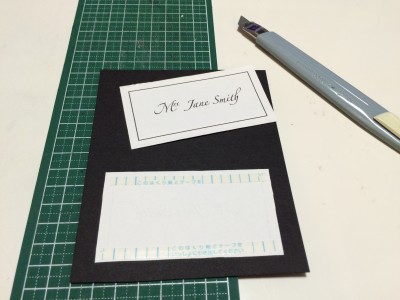
double stick names
2. apply double stick tape to the backs of the names and apply to the center of the front card. / 両面テープをネームの裏に貼り、表になる厚紙の中心に貼る。
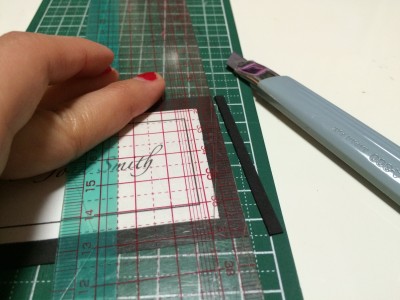
cut out card
3. cut out the front card to 10cm x 6cm/4in x 2 3/8in (here i cut 7mm/1/4in around the name paper using the patterning ruler). / 表カードを10cm×6cmに切る。(透明定規を使用してネームの周囲7mmでカットしました。)
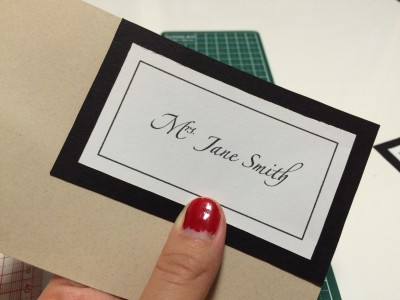
cut out backing
4. match the front card to a corner of the back card, and cut to the same size. / 裏紙の角に表カードを合わせ、表カードのサイズに合わせて切る。
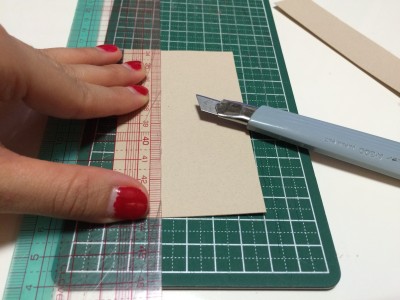
score backing
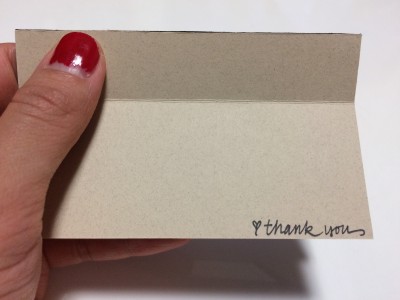
5. with a cutter, lightly score the back card 2cm/3/4in inside one of the longer sides. / カッターを使用して、裏カードを長い辺から2cm内側に軽〜く切り込みを入れる。
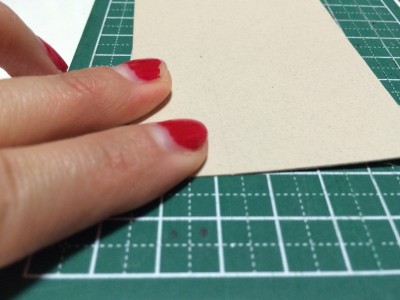
close up of score
here’s a close up of the score. / 切り込みのアップ。これくらい軽くでいいのです!
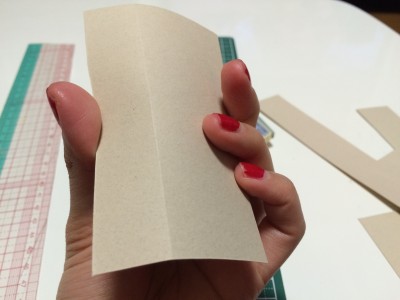
fold score
6. LIGHTLY fold score, with the cut side on the inside. / 優しく折り目を作る。切った面が内側の谷面になります。
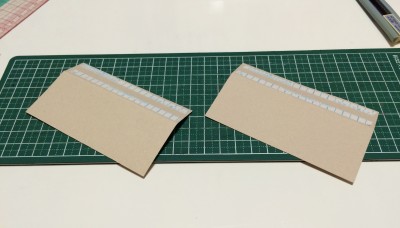
double stick backing
7. apply double stick tape to the thinner side of the score, again with the cut side facing down. / 山面になる側の細い部分に両面テープを貼る。
attach backing to card
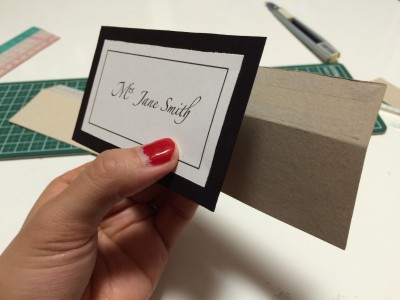
8. attach the backing to the front card, making sure that the name card is facing right-side up, and aligning the taped end to the top back side of the name card. / 裏カードを表カードと合体する。その際に、表カードのネーム面を手前に向け、裏カードのテープ面が表カードの裏の上端に合わさるように貼ります。
finished
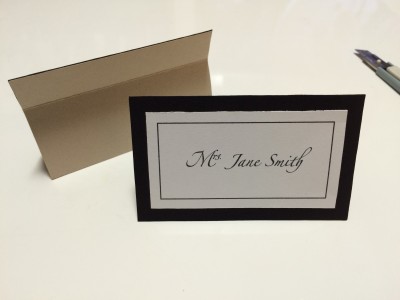
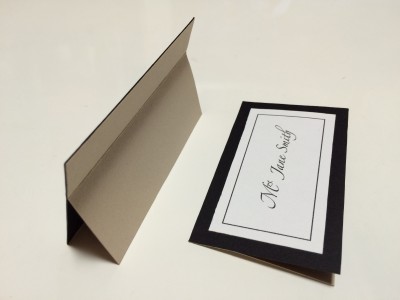
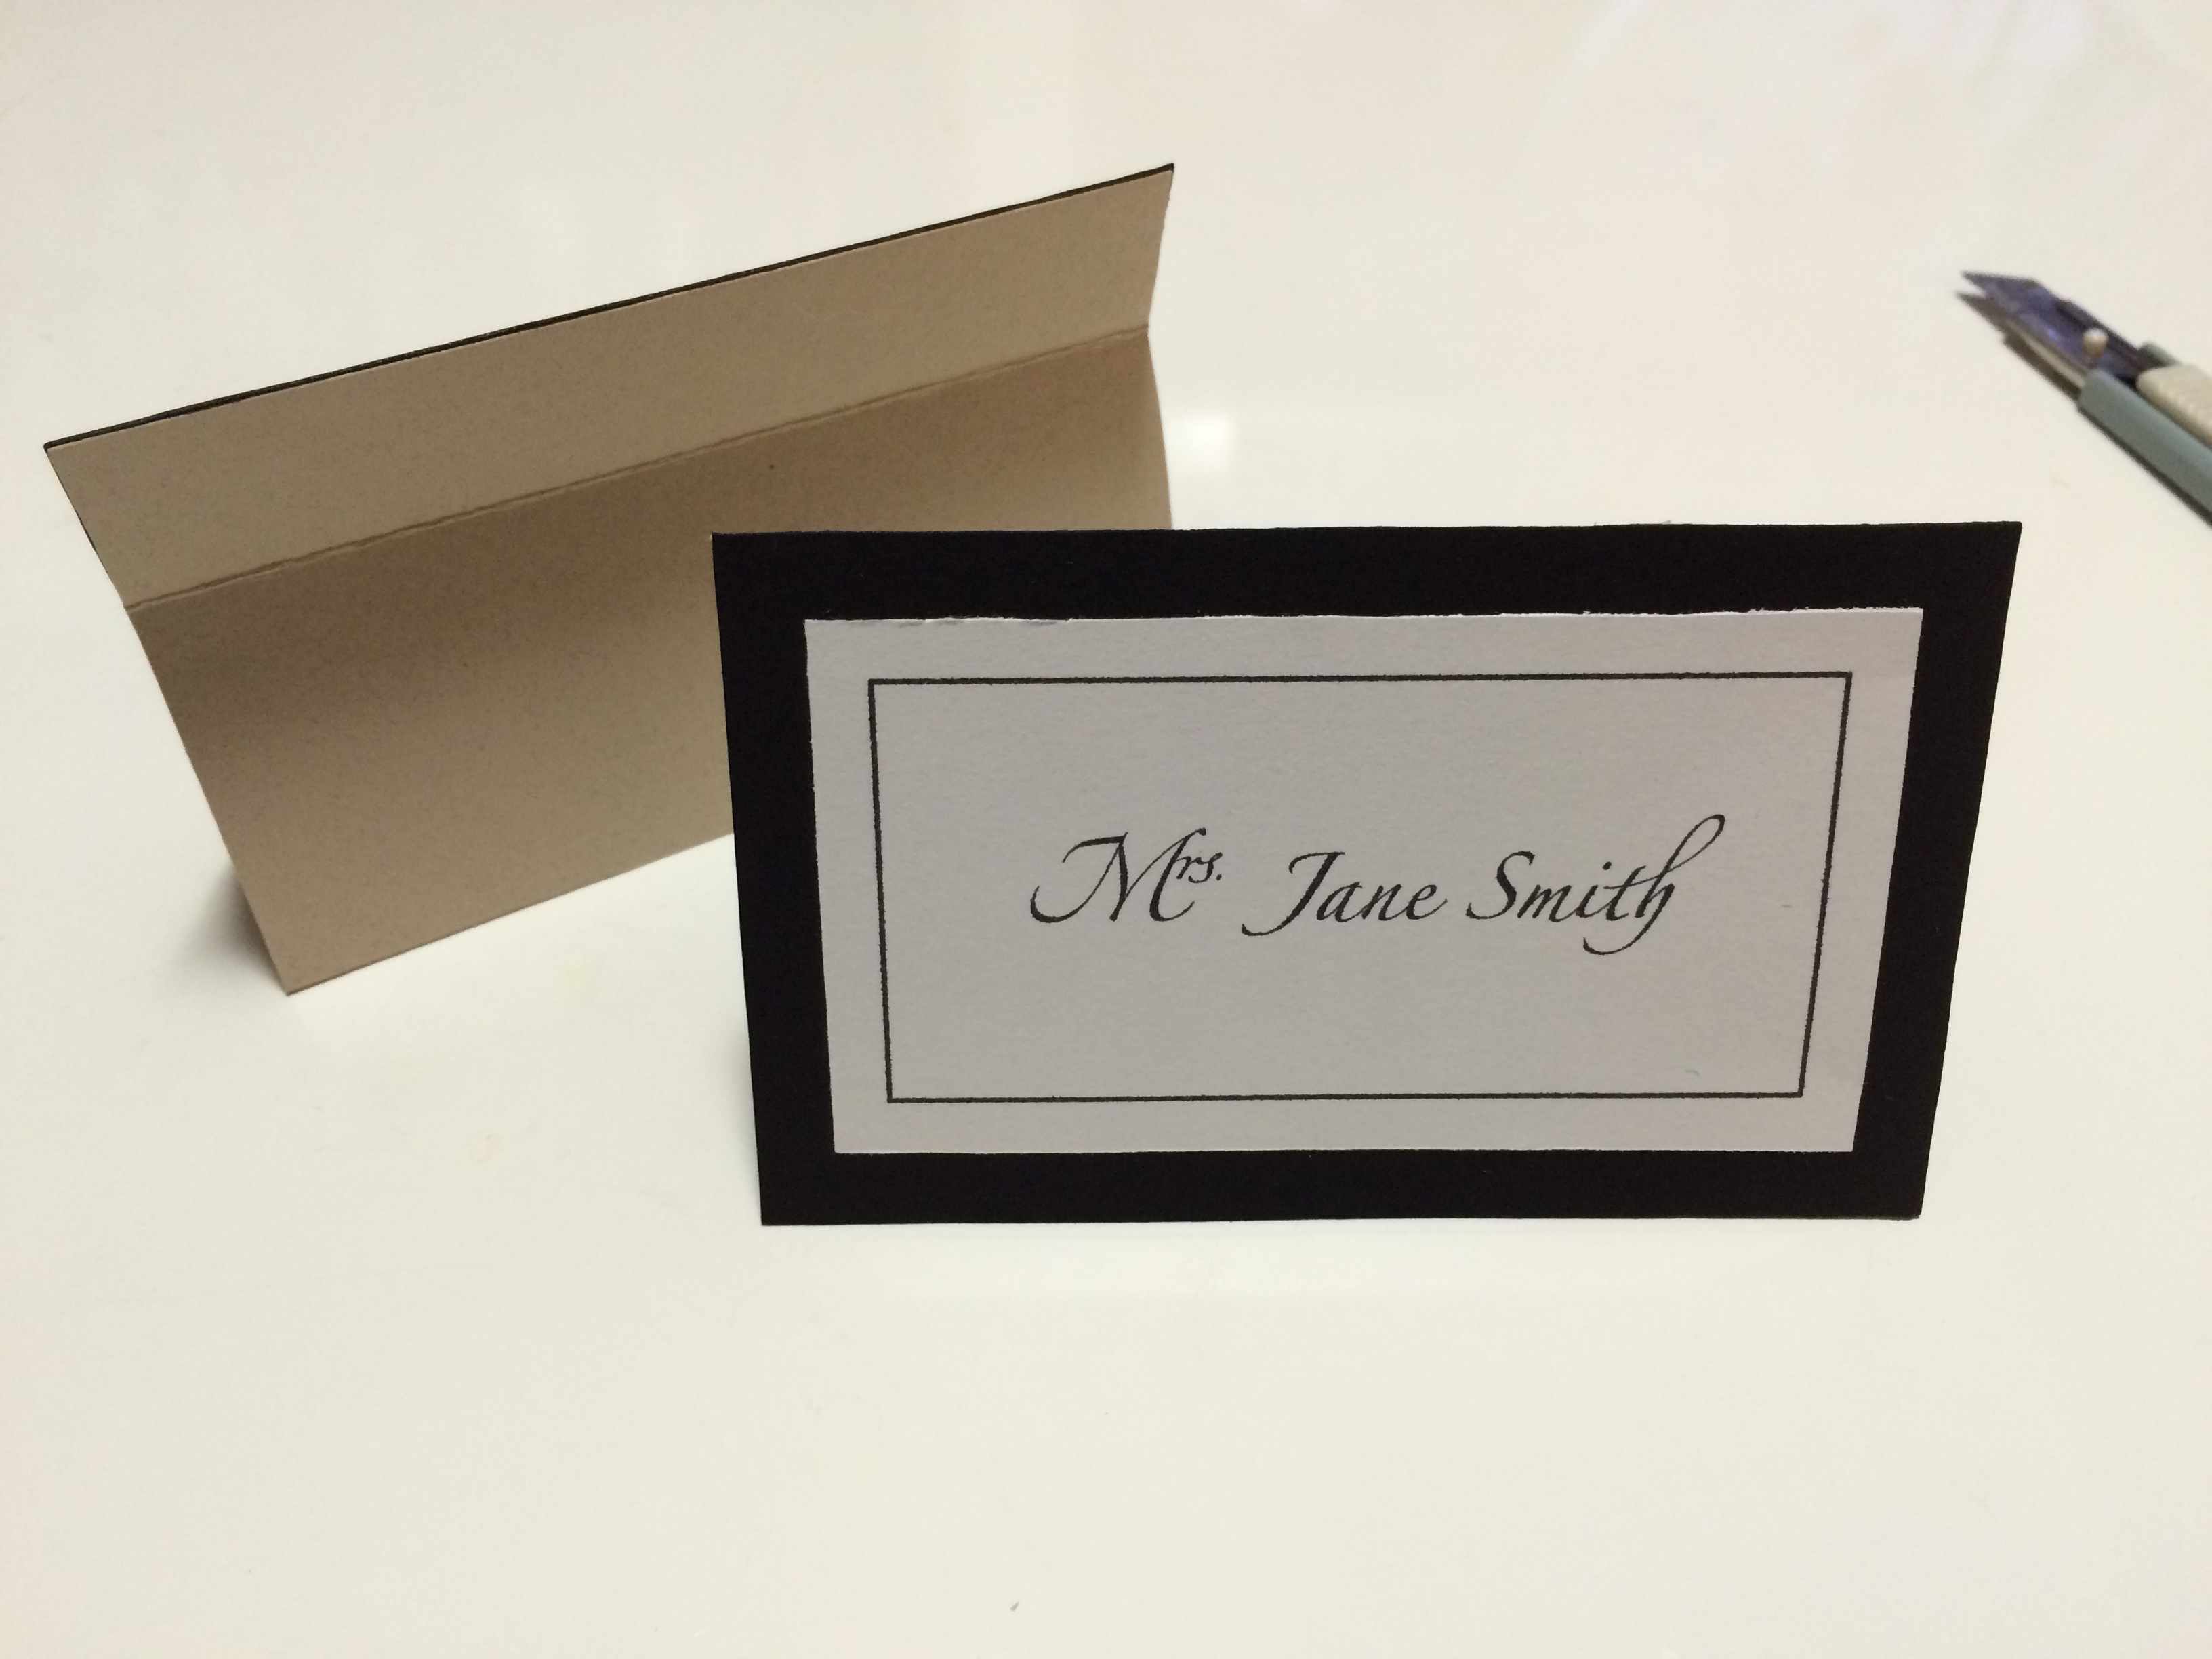
FINISHED! / 出来上がり!

it's flat!
this name card is great because it is easily flattened to lessen the load to take to your wedding reception! / この席札は、平にしやすい上、最低限の場所をとるので披露宴の荷物を詰めやすくします!

[side note / ちなみに]
regarding my printer & paper for d.i.y. wedding paper items
d.i.y.ウェディングペーパーアイテムで使用しているプリンターと紙について
printer & paper
| my printerプリンター |
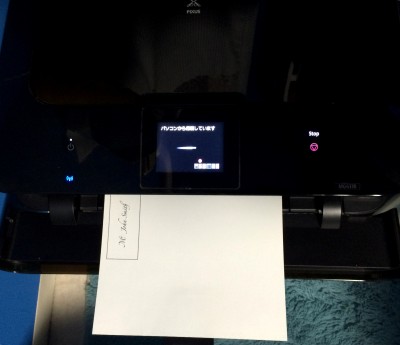
CANON PIXUS MG7530

an amazing purchase!! it prints both fine or fast, adjusts to many paper types, can print via wifi and from smart phones, and the quality is just great! for weddings, it’s best to print with a “fine printing” setting. it will look absolutely professional! / 重宝しています!ファインとスピーディで印刷設定を変えられ、様々な紙面に印刷できる上、wifiでスマホからも印刷できます。そして、何よりもクオリティが最高です!結婚式のためでしたら、ファイン設定がオススメです。

| aravealアラベール |
MY FAVORITE. i recommend it to all my customers for it’s supple texture and matte look. since i take orders for making name placements, i have my own batch that i order from this online shop and my computer prints perfectly on it. / お客様にいつもオススメしている紙です。表面の凹凸がさりげなく、なめらかでマットに仕上がります。席札のご注文をいただいているので、takeopaperさんから発注して常備しています。自宅のプリンターでも綺麗に印刷されます。

thank you

s+h wedding reception seating chart

i can’t believe it’s already been a week since last friday!!! this past week was “golden week” in japan, where a string of national holidays + the weekend make an extended vacation week. i try not to leave the house during this time, because out-of-towners from all over japan and the world crowd the whole city. in fact i always recommend to friends planning to visit from overseas to avoid this time of may. that said, since it is officially friday in japan, here’s this week’s #tbt #fbf post! explaining something a little different at japanese weddings.

今日はもう金曜日!!ゴールデンウイークもあってか今週もまたまたあっという間に過ぎてしまいました!毎年GW中は混雑を避ける為お出かけを控えるのですが、今年は2度都内に出かけました。ちょうど数年前に比べて外国人観光客が増えたかも〜と思っていたら、ニュースでも今年は観光客が増えたことを言っていました!外国の友人が日本へ遊びに来る時は、GWだけは避けた方が良いよーと伝えるのですが、今回、外国の観光客の方々を見て、人混みの多い都会を楽しむのも東京の観光ポイントの一つかもしれないですね!というところで、今週の #tbt #fbf は、欧米の結婚式と違う日本の結婚式で見られるある事です。

[WEDDING] S+H LOGO WEDDING SEKIJIHYO

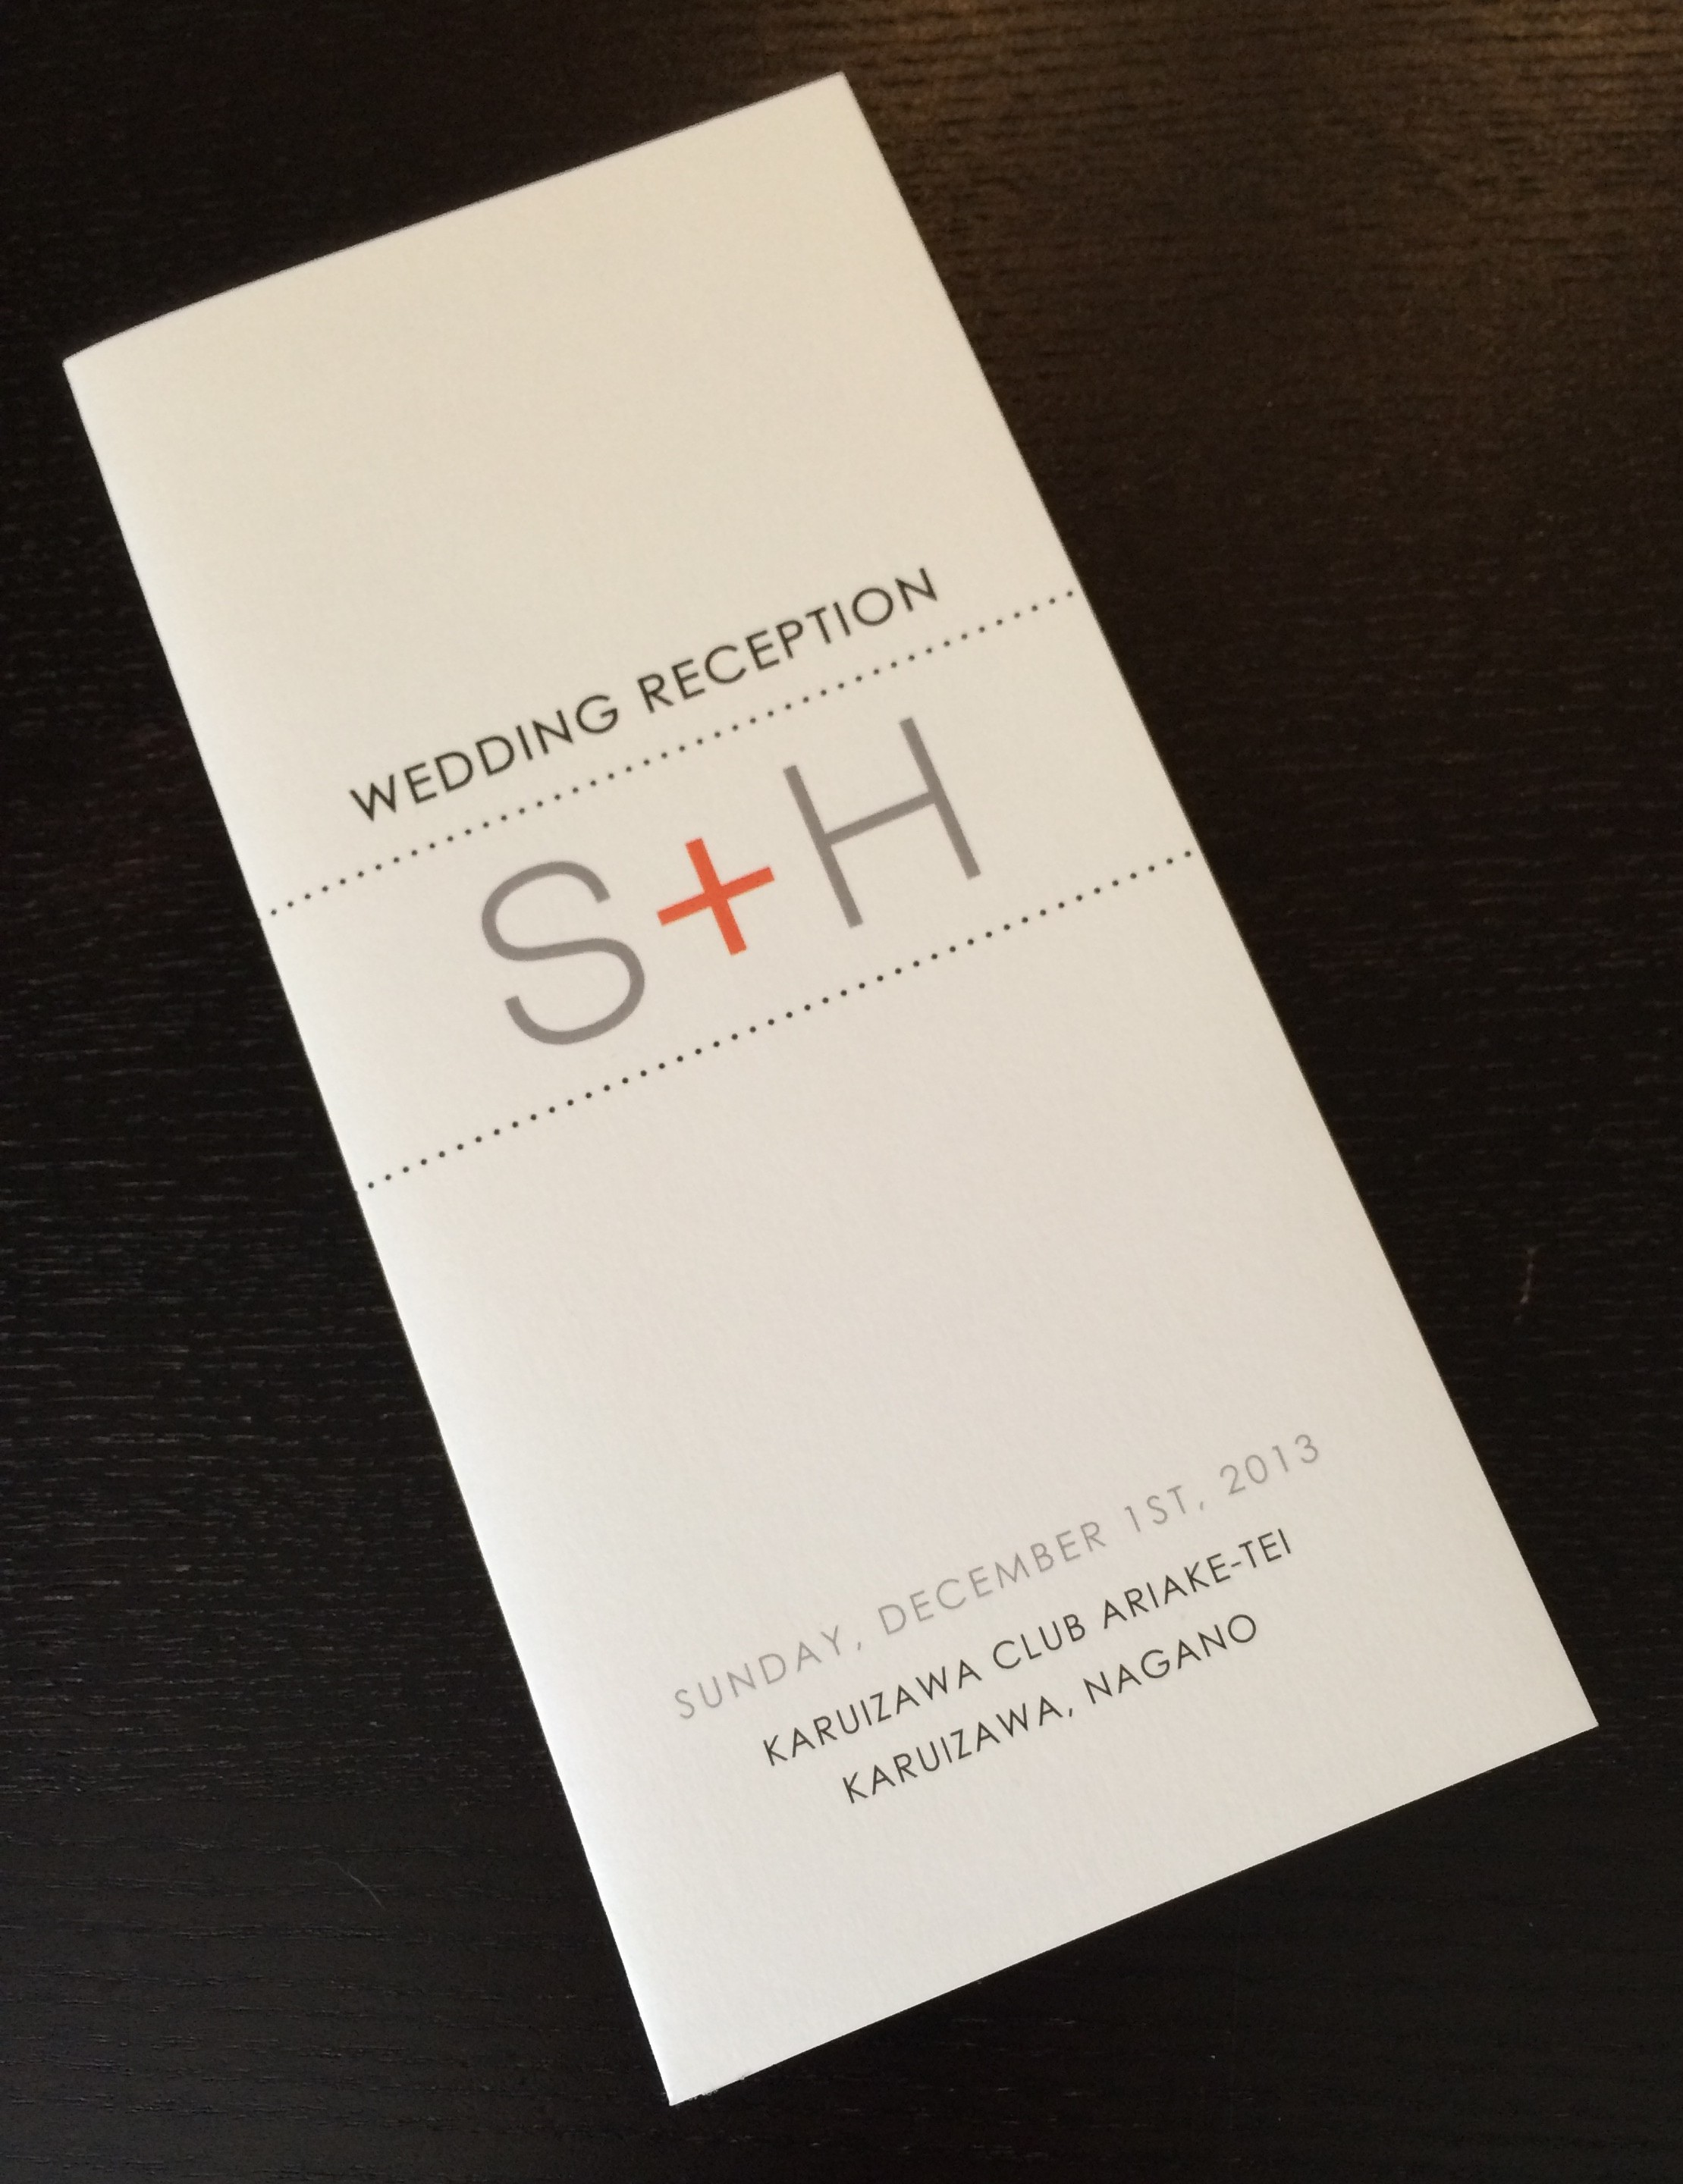
first, to explain a little about seating charts in japan. in western weddings, a seating chart may be found at the entrance into the wedding reception and guests find or are handed a name card with the table number of where to sit. in japan, all guests are handed something called a sekijihyo (or “seating chart”), which tells them exactly where to sit (not only the table number but also the exact seat, at which their name card will already be placed). this seating chart has all the guests’ full names, relation to the bride and/or groom, and if the guest is a work acquaintance, their job title as well.

欧米の結婚式で見られないのは『席次表』を渡される事です。欧米の『席次表』は、披露宴の入り口に大きくポスターやウェルカムボードの形をしたものが置いてある事が多いです。ウェルカムボードの近くにはゲストのネームカード(席札)がずらーっと並べてあり、テーブル番号ごとに並べてあったりします。それを持って、指定のテーブルへ行って座る位置を自分で選ぶ事が多いです。(もしくは、指定のテーブルのセンターにネームカードが置いてあり、自分で選んだ席にネームカードを置く事もあります。)ゲストの肩書きや新郎新婦との関係が書かれる事は無く、相手の事を知らない要素が他人との会話をスタートさせるきっかけになるのだと思います。

[WEDDING] S+H LOGO WEDDING SEKIJIHYO
[WEDDING] S+H LOGO WEDDING SEKIJIHYO

no matter the country or culture, the great thing about being a wedding item designer is that i can be creative, have fun, and see my clients and their guests enjoy the creativity.

最終的には、国や文化が違っても、ウェディングアイテムデザイナーとして一番楽しいのは、創造力を発揮できお客様とそのゲストの方々がそれをエンジョイしていただける事です。

S  M  I  L  E    L  U  V

[d.i.y.] tulle veiled wedding programs

[WEDDING] TULLE WEDDING PROGRAMS
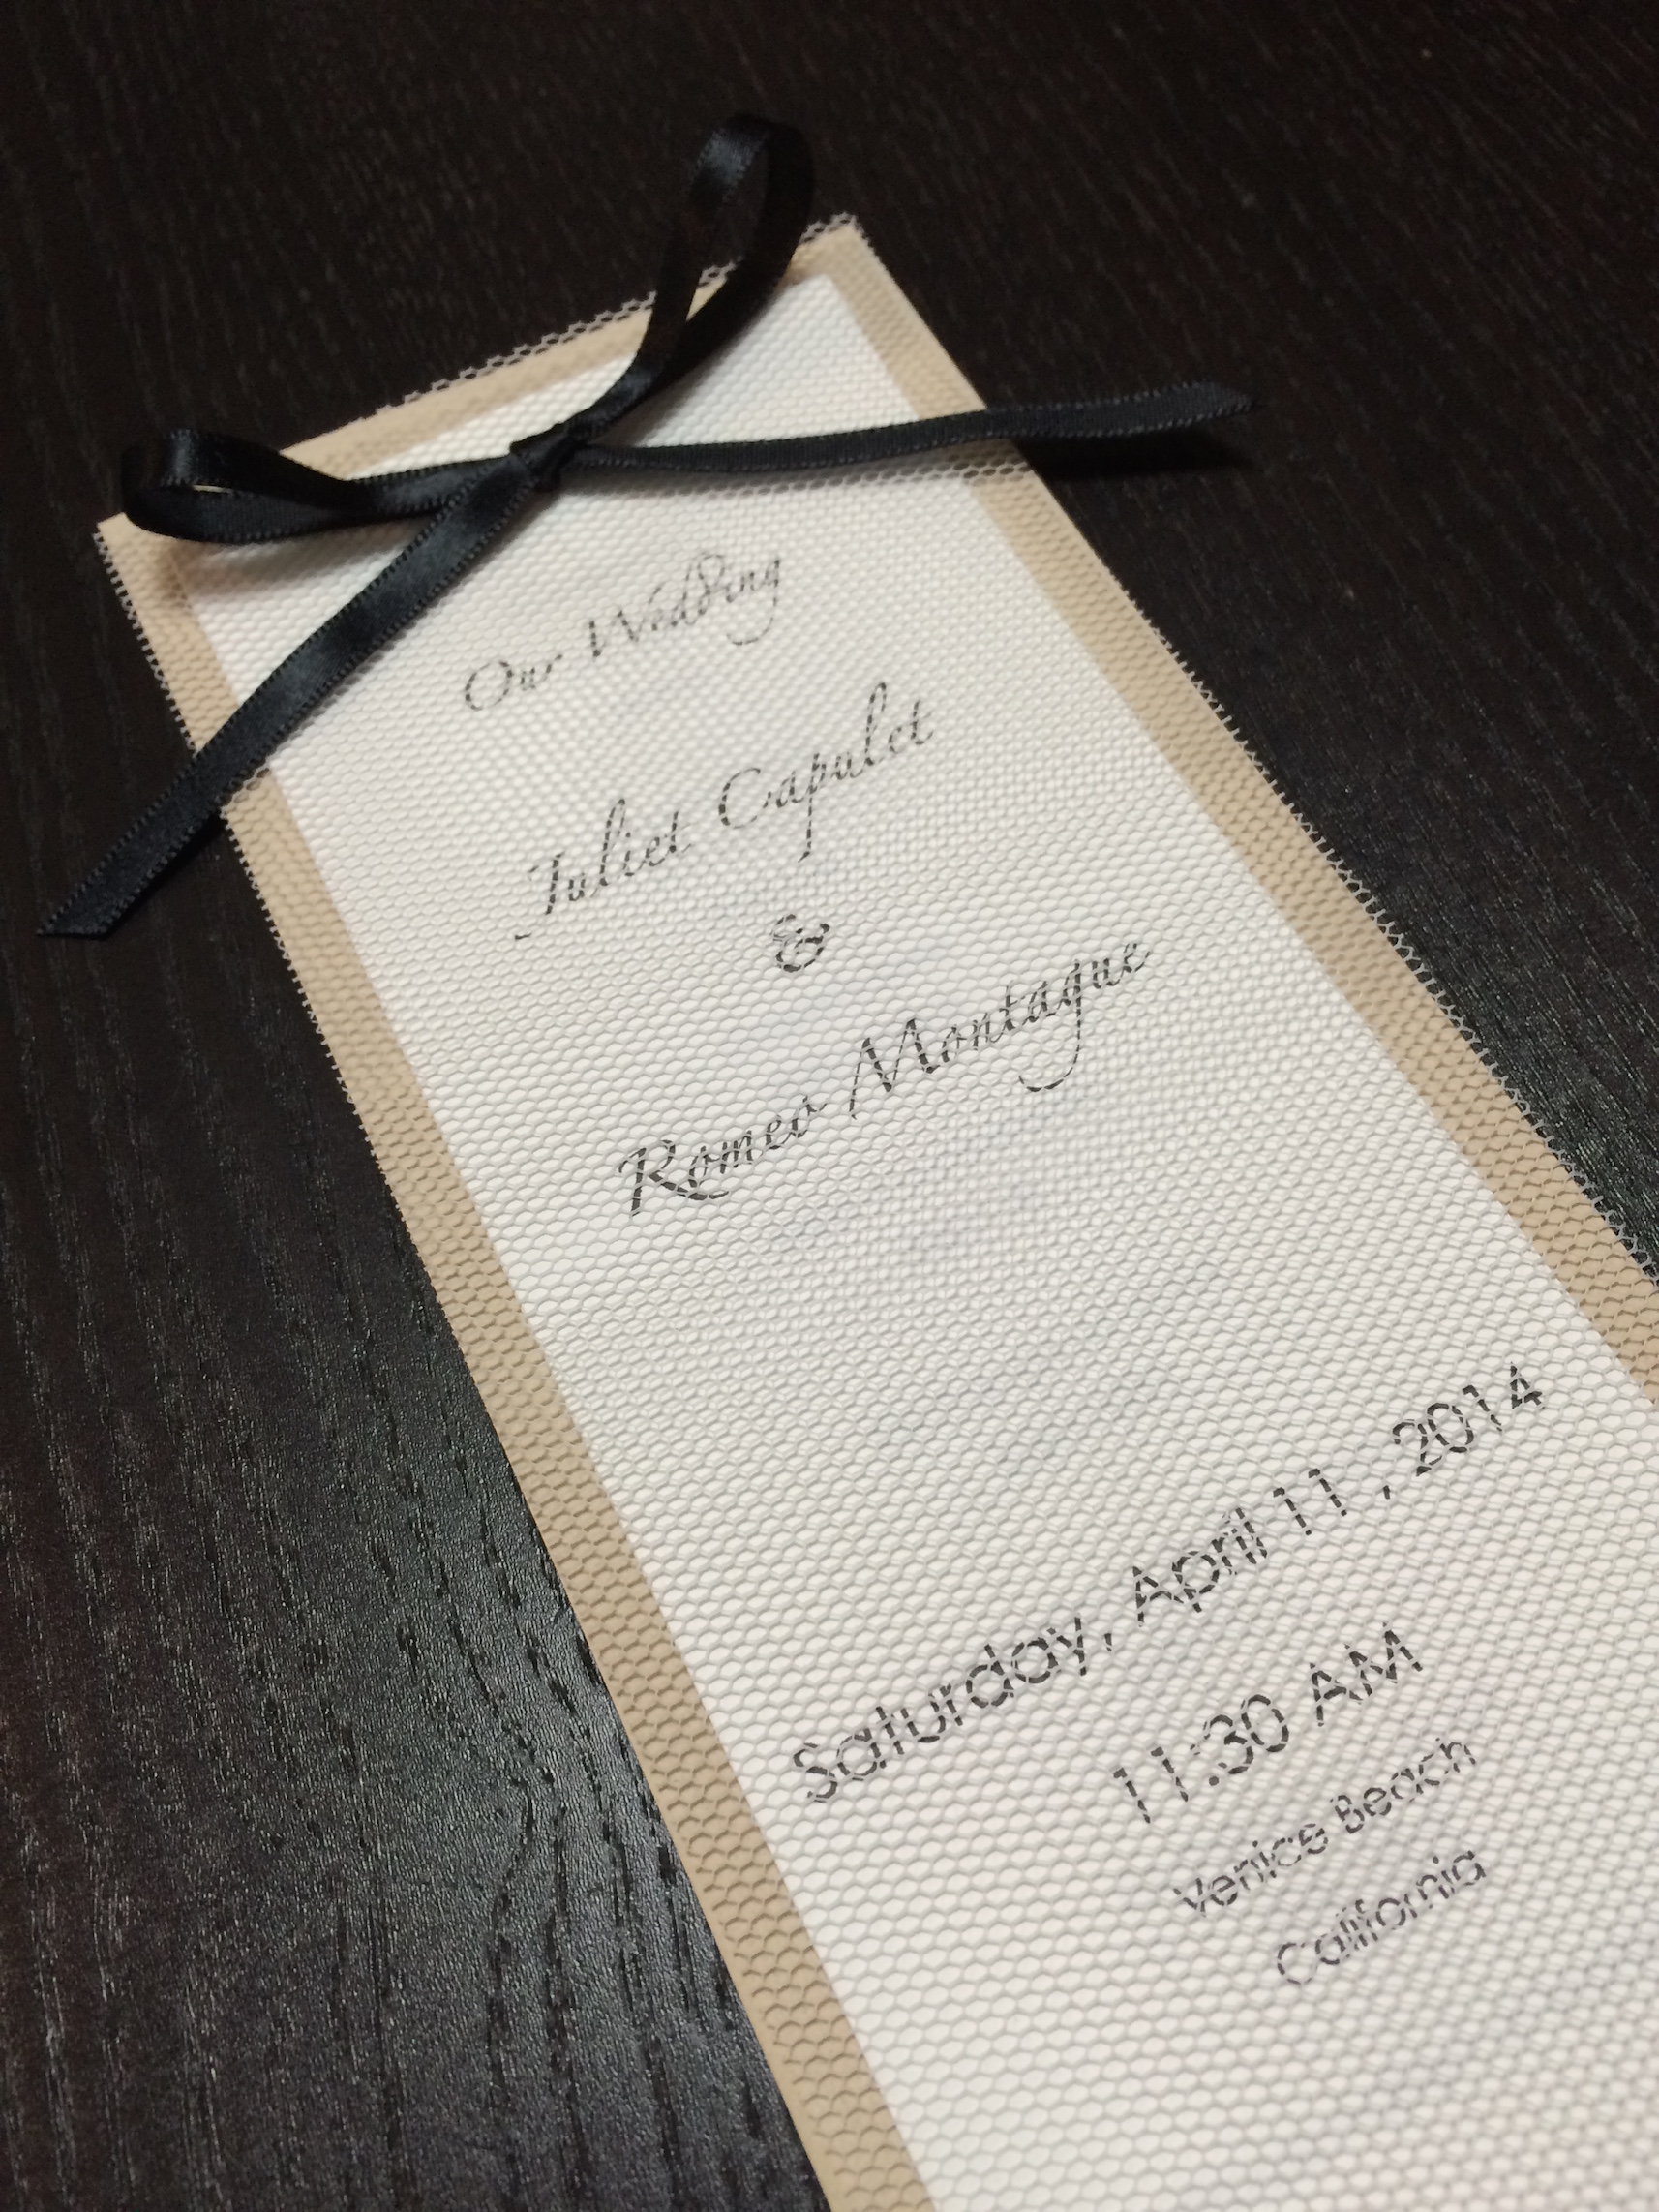
i introduced this “tulle veiled wedding program” on one of my #tbt #fbf posts last month. on this post, i will show you how to make it yourself! i recommend this especially if you’re in your wedding crunch time. to make this program from printing -> cutting the paper and tulle, to tying the ribbon, it took me a total of 30 minutes.
以前に #tbt #fbf の書き込みでこちらの「チュールベールのウェディングプログラム」をご紹介いたしました。今回は、こちらをご自身で作れる d.i.y. をご説明いたします。特にご結婚式の最終段階でお急ぎの場合は特におすすめの d.i.y. です!印刷から紙とチュールの裁断、リボンを結ぶまでかかった時間は30分!

LET’S START! / 始めよう!

what you need / 材料:
any A4 size printing paper / お好みのA4サイズ印刷用紙
card stock (9cm × 22.75cm) / カード紙 (9cm × 22.75cm)
tulle (9cm × 22.75cm) / チュール (9cm × 22.75cm)
scissors / ハサミ
ruler / 定規
hole puncher (i used a 3mm hole, up to 5mm is fine) /
穴あけパンチ (今回は、3mmの穴を使用しましたが、5mmまで可能)
5mm width ribbon (45cm) / 5mm幅リボン (45cm)

[d.i.y.] tulle veiled wedding programs-1
1. create your text on a spreadsheet application using landscape orientation. each individual page should measure 7.5cm × 21cm, which means 3 pages can fit on 1 A4 size page. print.
テキストをスプレッドシートアプリケーションなどを使用して、横向きで作成する。1枚1枚のページサイズが 7.5cm × 21cm になるように、アプリケーション上でA4サイズに3枚のページを横に並べる。印刷する。

[d.i.y.] tulle veiled wedding programs-2
2. card stock should be cut to 9cm × 22.75cm. then, cut A4 size printed text into individual pages measuring to 7.5cm × 21cm.
カード紙は 9cm × 22.75cm にカットし、A4 用紙は 7.5cm × 21cm のページに切り分ける。

[d.i.y.] tulle veiled wedding programs-3
3. cut tulle to the same size as card stock.
チュールはカード紙と同じサイズに合わせて切る。

[d.i.y.] tulle veiled wedding programs-4
4. place tulle and program pages as shown in photo. the top of the pages should be placed 0.6cm away from the edge of the tulle. punch a hole 1cm from the top of the pages and horizontally in the center. if possible, it is more efficient to punch a hole through the pages and tulle all in one go.
プログラムのページとチュールを写真のように重ねる。ページの上端から1cm、横幅の中心位置に穴をあける。可能であれば、チュールと紙をいっぺんに穴あけしますと効率よく、綺麗に仕上がりやすいと思います。

[d.i.y.] tulle veiled wedding programs-5
5. mark and punch two holes in the card stock. 1.7cm away from the top, 3cm apart.
カード紙に穴を2つ開ける。上端から1.7cm、3cm間隔で。

[d.i.y.] tulle veiled wedding programs-6
6. prepare 45cm length ribbon. / 45cmのリボンを用意する。

[d.i.y.] tulle veiled wedding programs-7
7. this is the last step! pull the ribbon evenly through the two holes of the card stock. then pull the ribbon through the single hole of the program pages, then tulle cover.
最後のステップです!カード紙の2つの穴にリボンを通し、続けてページとチュールの1つの穴に通す。

[d.i.y.] tulle veiled wedding programs-8
8. make sure to pull the ribbon all the way through and evenly!
リボンはきつめに引っ張ってカード紙から通したリボンが平行になっていることを確認。

[d.i.y.] tulle veiled wedding programs-9
9. tie the ribbon and voila! / リボンを結んで完成!

FINISHED!

banana leaf paper wedding program

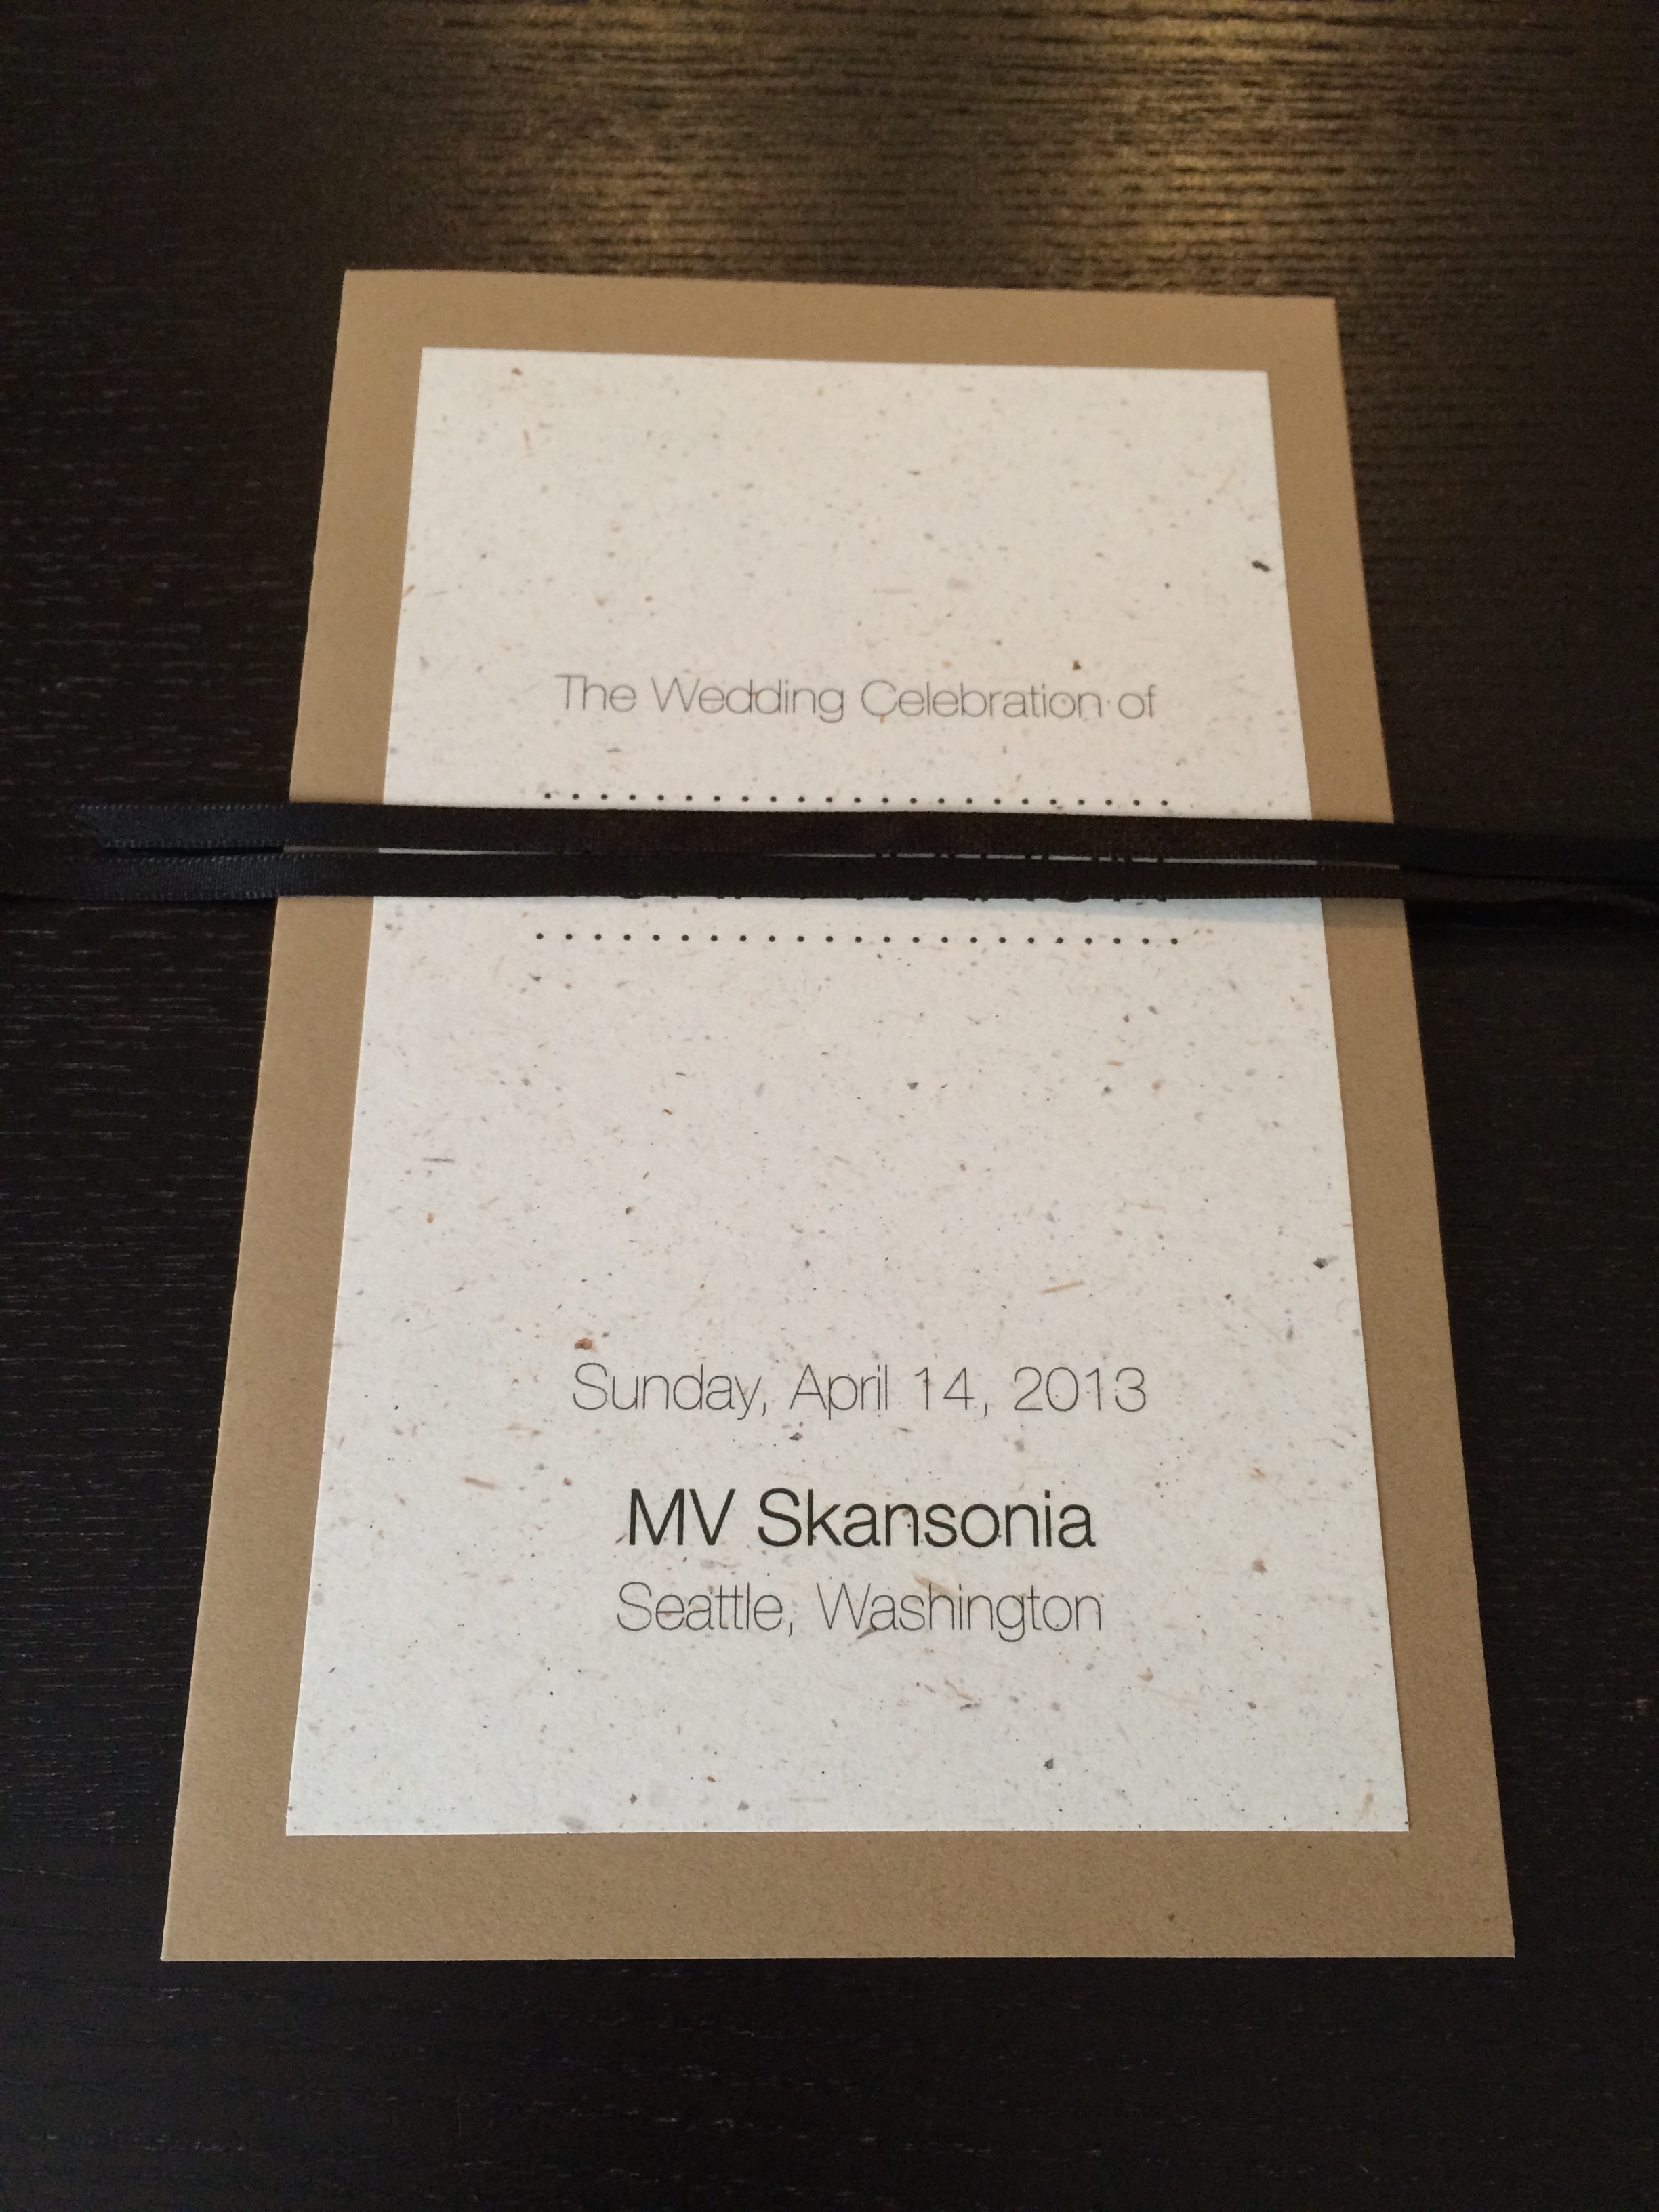
#tbt #fbf past wedding item post time! this time is about a simple and natural wedding program. i actually made these for my friend’s wedding. we went to the store together and she selected brown craft paper for the base and banana leaf printing paper. the banana leaf paper is really wonderful visually (the texture!) and ecologically–apparently, for each banana tree, after bananas are harvested, the trees/leaves go to waste (i just learned this recently, from a Panasonic “Eco-Navi” video on the train!)

#tbt #fbf の過去のウェディングアイテムをご紹介デーです!今回は、シンプルでナチュラルなウェディング式次第。これは、アメリカの友人の結婚式のために作ったものになります。一緒にお店に行って材料を買いに行ったのですが、彼女が選んだのは、未晒しのクラフト紙とバナナリーフの自宅印刷用紙。バナナリーフ紙は、ビジュアル的にも(手触り)eco的にも本当に素敵なものなのです。つい最近、山手線のトレインチャンネルで流れていた動画で見たのですが、バナナの木は一度しか実らないため、実が収穫されたら、茎は廃棄されるのです。

[WEDDING] NATURAL BI-FOLD WEDDING PROGRAM

[WEDDING] NATURAL BI-FOLD WEDDING PROGRAM

same as my previous #fbf post, this program was also created on a spreadsheet application and printed at home. i’ve also introduced this program on an earlier blog post, talking about my favorite fonts, “helvetica neue ultra light”.

前回と同様、今回の式次第もスプレッドシート作成アプリで作ったテキストを自宅で印刷しました。そして、実は、以前に私のお気に入りのフォント(「ヘルヴェティカ・ニュー ウルトラライト」)をご紹介した際にこのウェディングプログラムをブログでお見せしております。

[WEDDING] NATURAL BI-FOLD WEDDING PROGRAM

on the back, i “instagrammed” a screenshot of their personal wedding homepage to gather photos of their special day on their personal wedding hashtag.

裏面にはお二人のウェディングホームページから撮ったスクリーンショットをインスタグラムで画像処理をし、ゲストから当日のお写真を催促するお二人のハッシュタグを作りました。

tulle veiled wedding programs

#tbt #fbf past wedding item post time! this week i bring to you, tulle veiled wedding programs. in continuance with the black and white series, this is one of the day-of paper items. one of the easiest to make, but sweetest programs. if you’re doing a d.i.y. wedding, and are in that last minute wedding crunch, i recommend these! i’ll post a d.i.y. of this soon.

#tbt #fbf の過去のウェディングアイテムをご紹介デーです!今週は、チュールベールのウェディングプログラム。この2週間ご紹介してきましたモノクロシリーズの当日のアイテムになります。d.i.y.ウェディングを考えられている方にオススメな簡単だけどスウィートな式次第です。特に、結婚式の準備でラストスパート中に時間が限られているのであれば、是非作ってみてください!近々 d.i.y.版をアップいたします。

[WEDDING] TULLE WEDDING PROGRAMS

a lot of the wedding items i make are printed professionally, which needs to be planned ahead of time. sometimes, if i’m overseas helping with friends’ or family’s weddings, i don’t always have this time or the resources. i used a spreadsheet application to type and print out the text. instead of using a normal computer paper, i used printable japanese washi (traditional japanese paper in which fibers stay in tact and are visible on the surface) paper. as this program is bound by ribbon, any amount of pages can be added.

ほとんどのウェディングでは、印刷会社に印刷を注文することが多いです。その場合には、印刷の納期を考え、事前にテキストやデザインを決めることが必要です。だが、海外で親友や家族のウェディングのお手伝いする場合は、このように時間や発注先がないケースが多いです。このウェディングではスプレッドシート作成アプリケーションを使用し、家庭用プリンターで印刷しました。そして、紙は印刷用の和紙を使用しました。リボン綴じの式次第なので、好きなだけページを増やすことができます!

[WEDDING] TULLE WEDDING PROGRAMS

black and white dress and tuxedo invitations

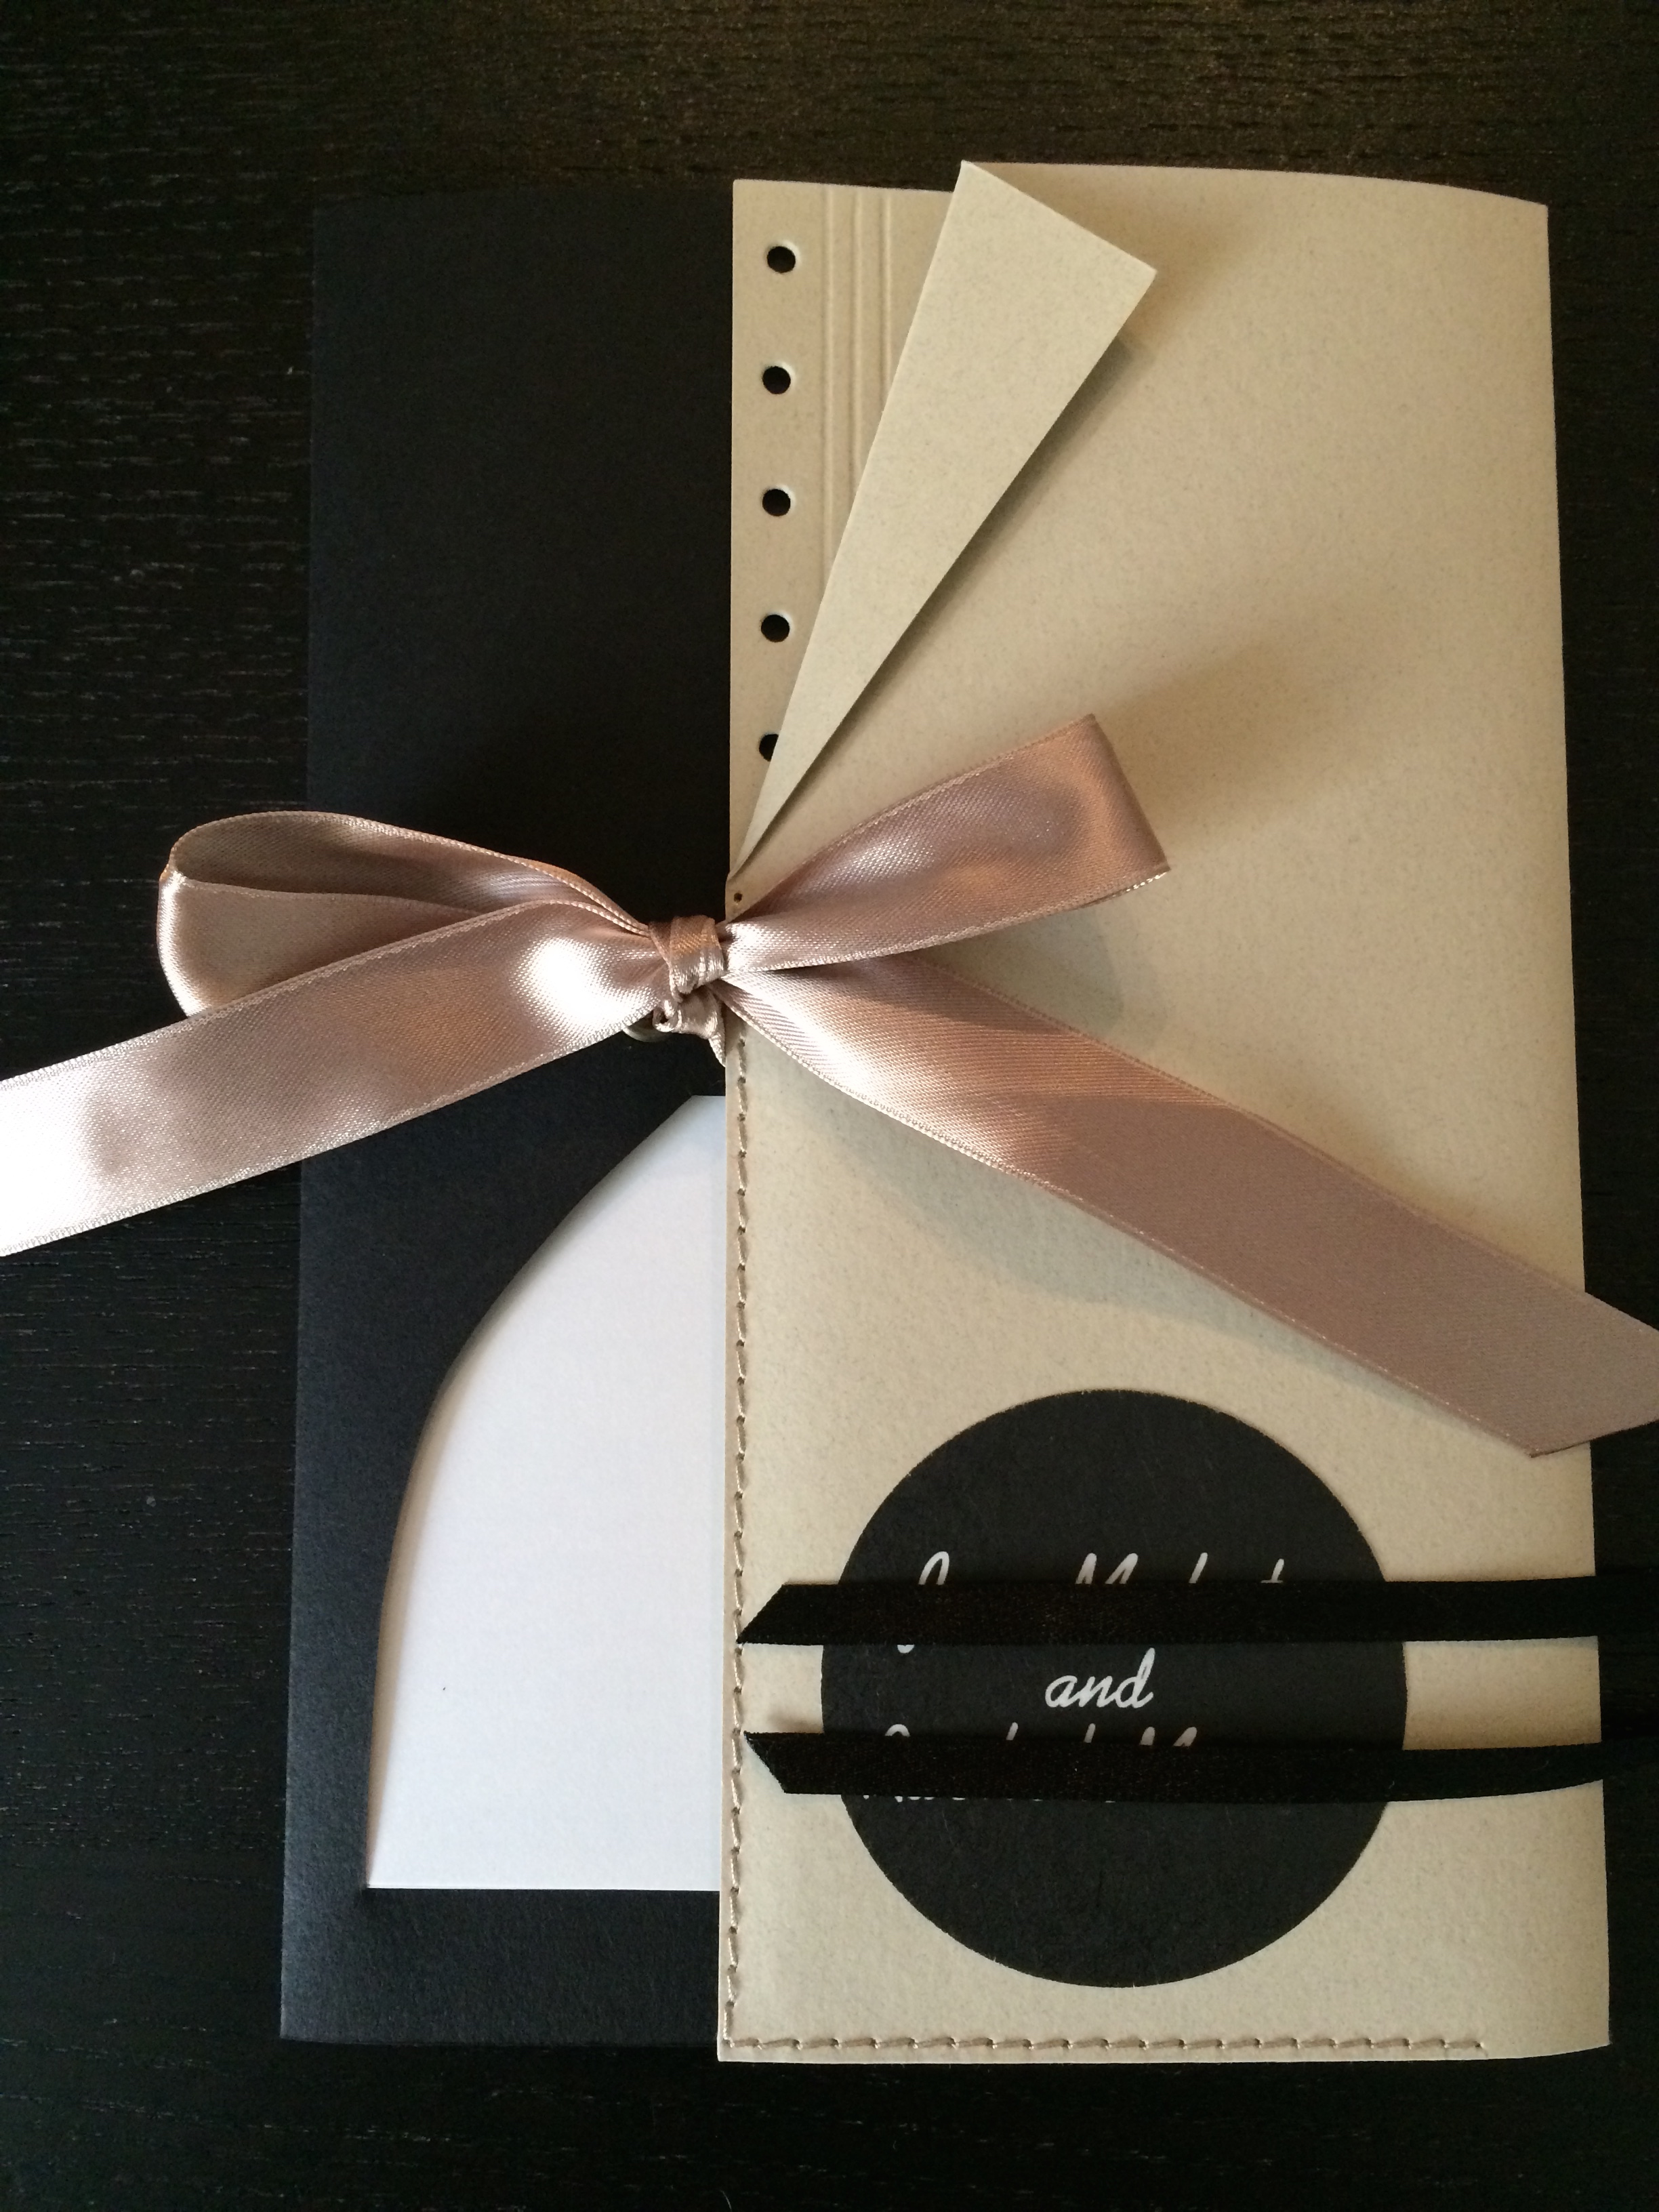
#tbt #fbf past wedding item post time! today i bring to you, a tri-fold wedding dress and tuxedo invitation. if you look closely, you’ll see a tuxedo detail on the right fold, a dress/skirt shaped pocket on the left fold.  it’s actually the continuation to the polaroid save the date from last week, and the “polaroid” photos are incorporated into the contents.

#tbt #fbf の過去のウェディングアイテムをご紹介デーです!今日は、三つ折りウェディングドレス/タキシード風招待状です。よく見ると、ベージュの部分の端にタキシード、黒い部分にはスカートの形のポケット。この招待状は、先週のポラロイド風の save the date の続きになるので、引き続き写真がデザインポイントになっております。

[WEDDING] BLACK AND WHITE INVITATIONS CONTENTS

[WEDDING] BLACK AND WHITE INVITATIONS

i often like to sew my cards, sometimes by hand, sometimes with a sewing machine. each has it’s own distinct feeling to it.
カードを縫うことが好きで、時々手縫い、時々ミシン縫いを使用します。どちらも独特な雰囲気になります。

[WEDDING] BLACK AND WHITE INVITATIONS

[WEDDING] BLACK AND WHITE INVITATIONS CONTENTS

in the access card is a skyline which combines both seattle and yokohama, which are memorable locations for the wedding couple.
アクセスカードには街の輪郭(スカイライン)が見えます。これは新郎新婦の思い出の地、アメリカのシアトルと横浜をつなげたものになります。

[WEDDING] BLACK AND WHITE INVITATIONS

this was the invitation that brought me into wedding item designs.
この招待状がきっかけにウェディングアイテムのデザイナーになりました。

polaroid save the date

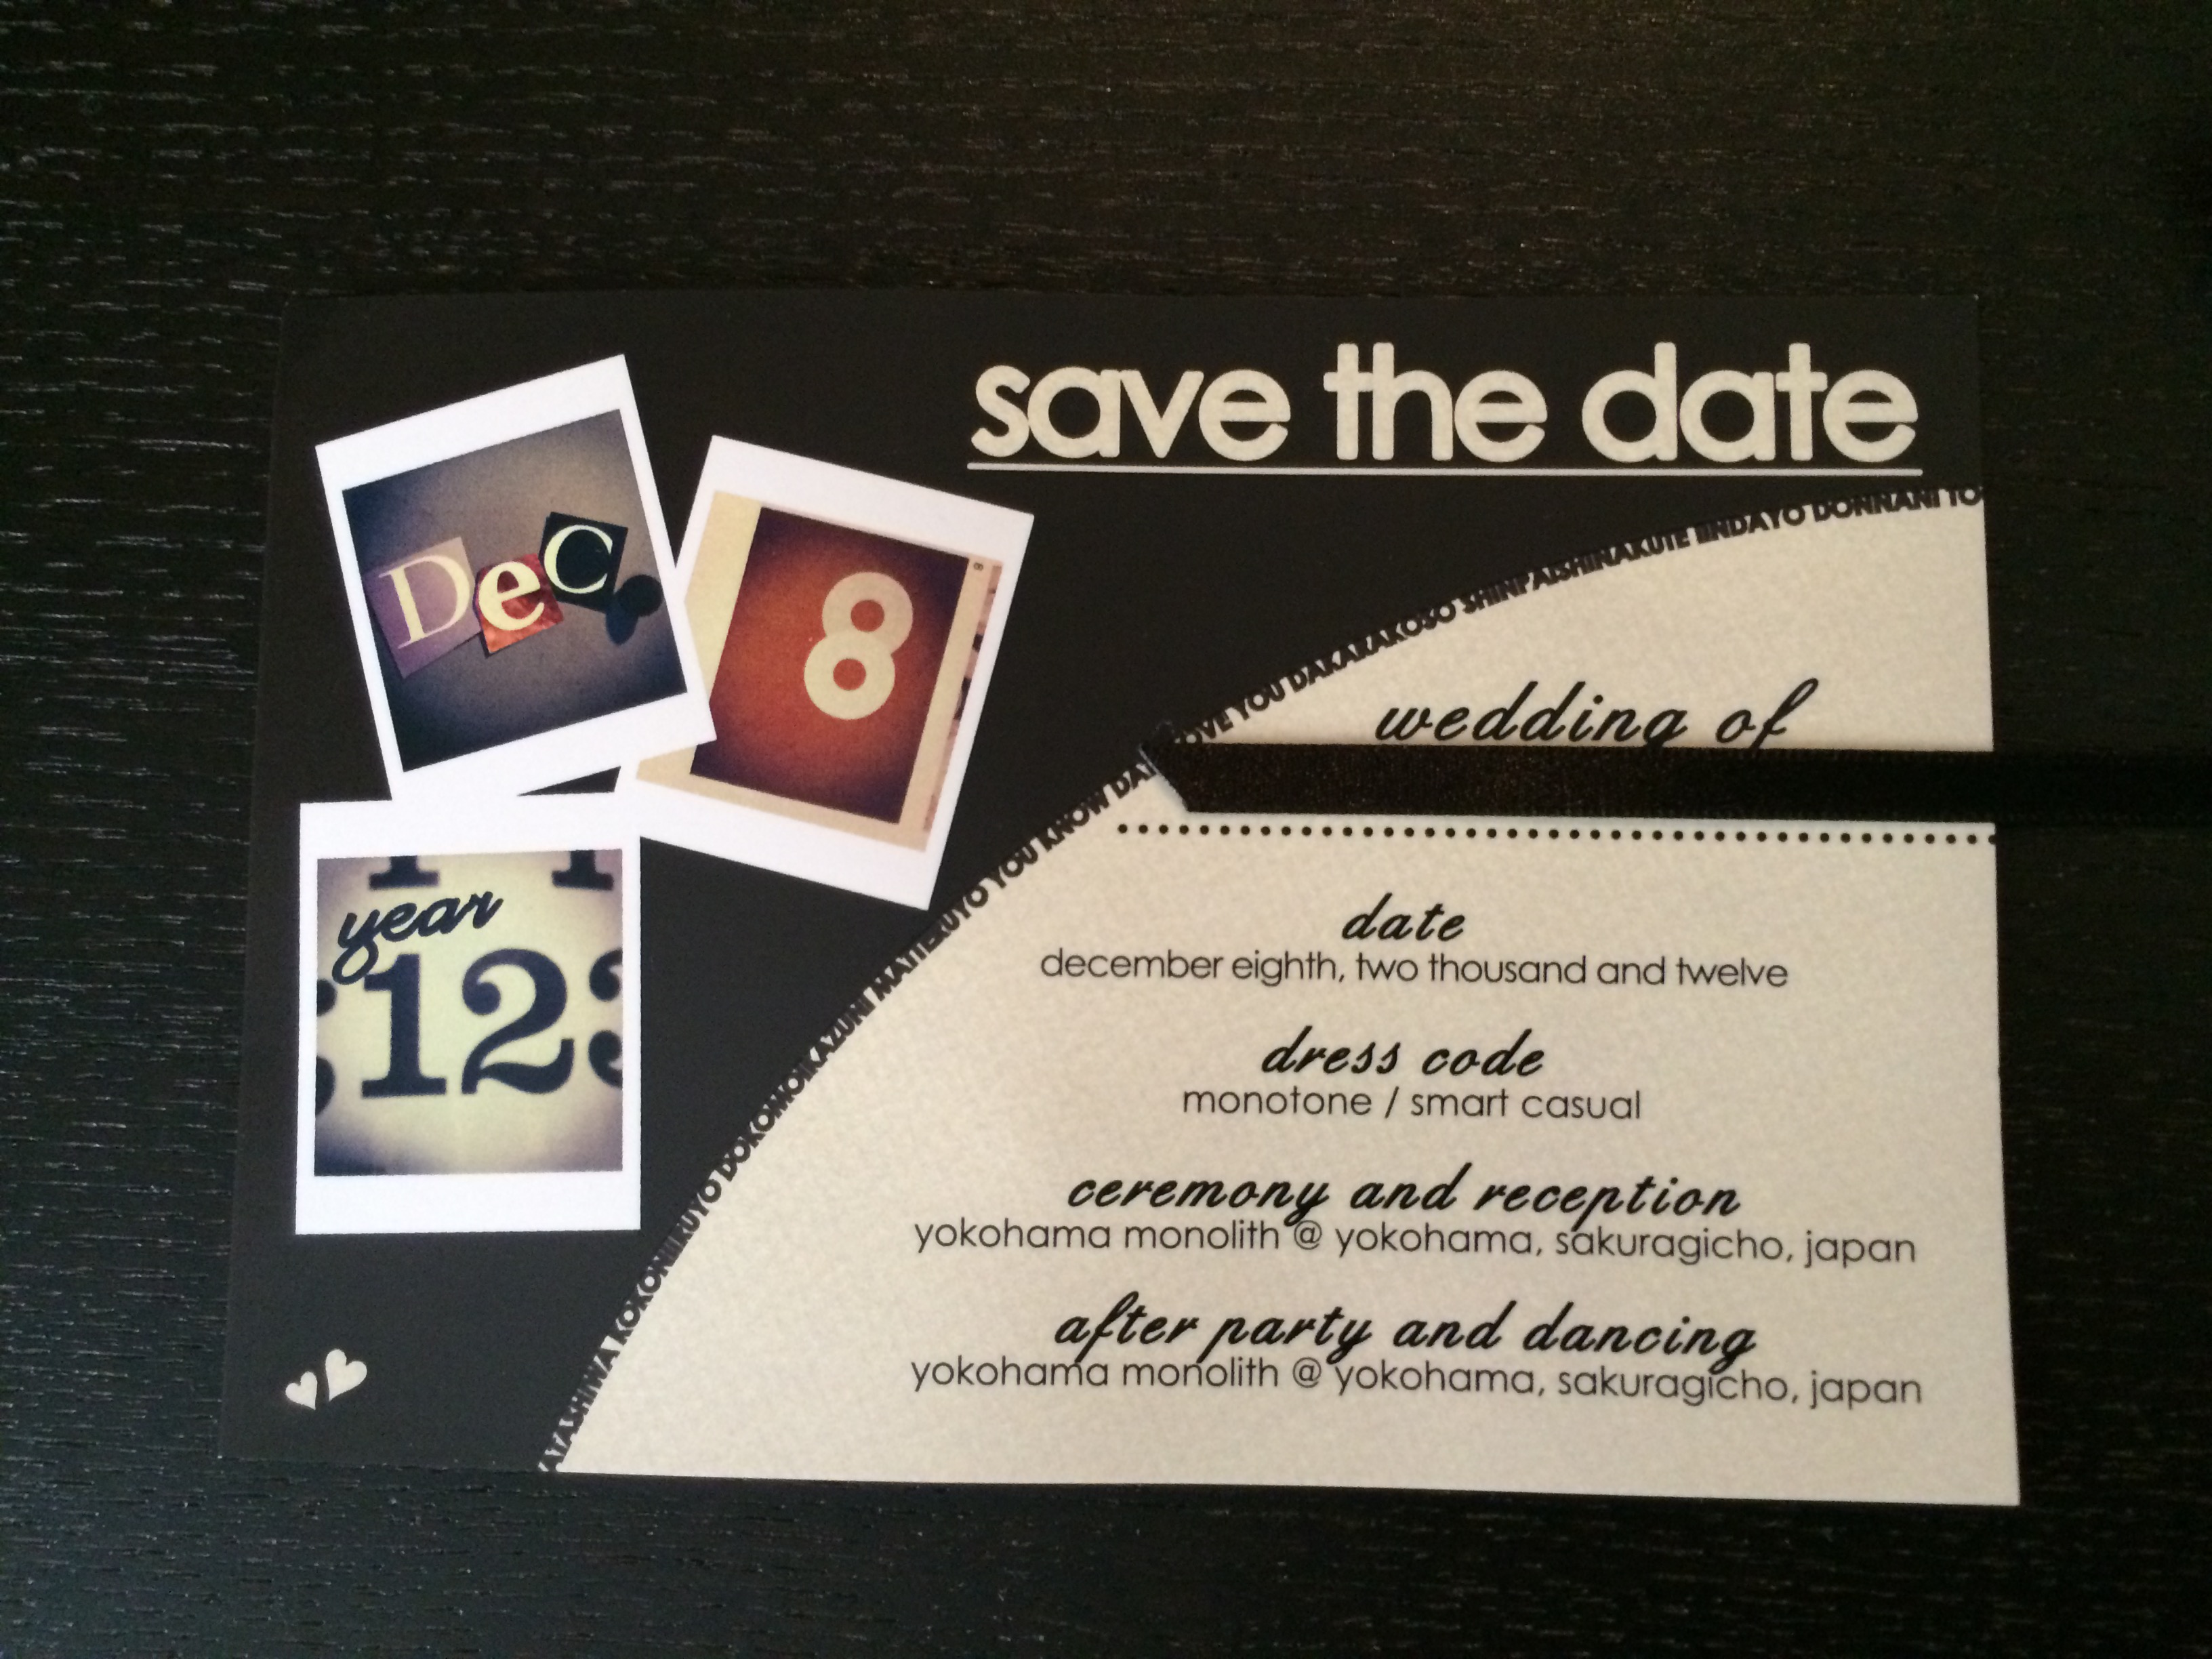
it’s that time of the week!  #tbt/#fbf to this save the date from 2012 i designed for a “polaroid” themed wedding. / #tbt/#fbf の時間です!2012年にデザインしたポラロイドテーマの save the date ハガキ。

– “polaroid” photos are instagram photos taken by the bride / 「ポラロイド」写真は新婦の撮ったインスタグラム写真

– the couple’s “song” lyrics are hidden in the postcard / カップルの記念の歌の歌詞が隠れています

– beige background is a scan of textured cream colored paper (“save the date” and hearts are cut outs and show the textured background) / ベージュの背景は凹凸のある紙をスキャンして使用(「save the date」とハート達は黒背景から切り抜いて背景を見せている)