ペーパーアイテム

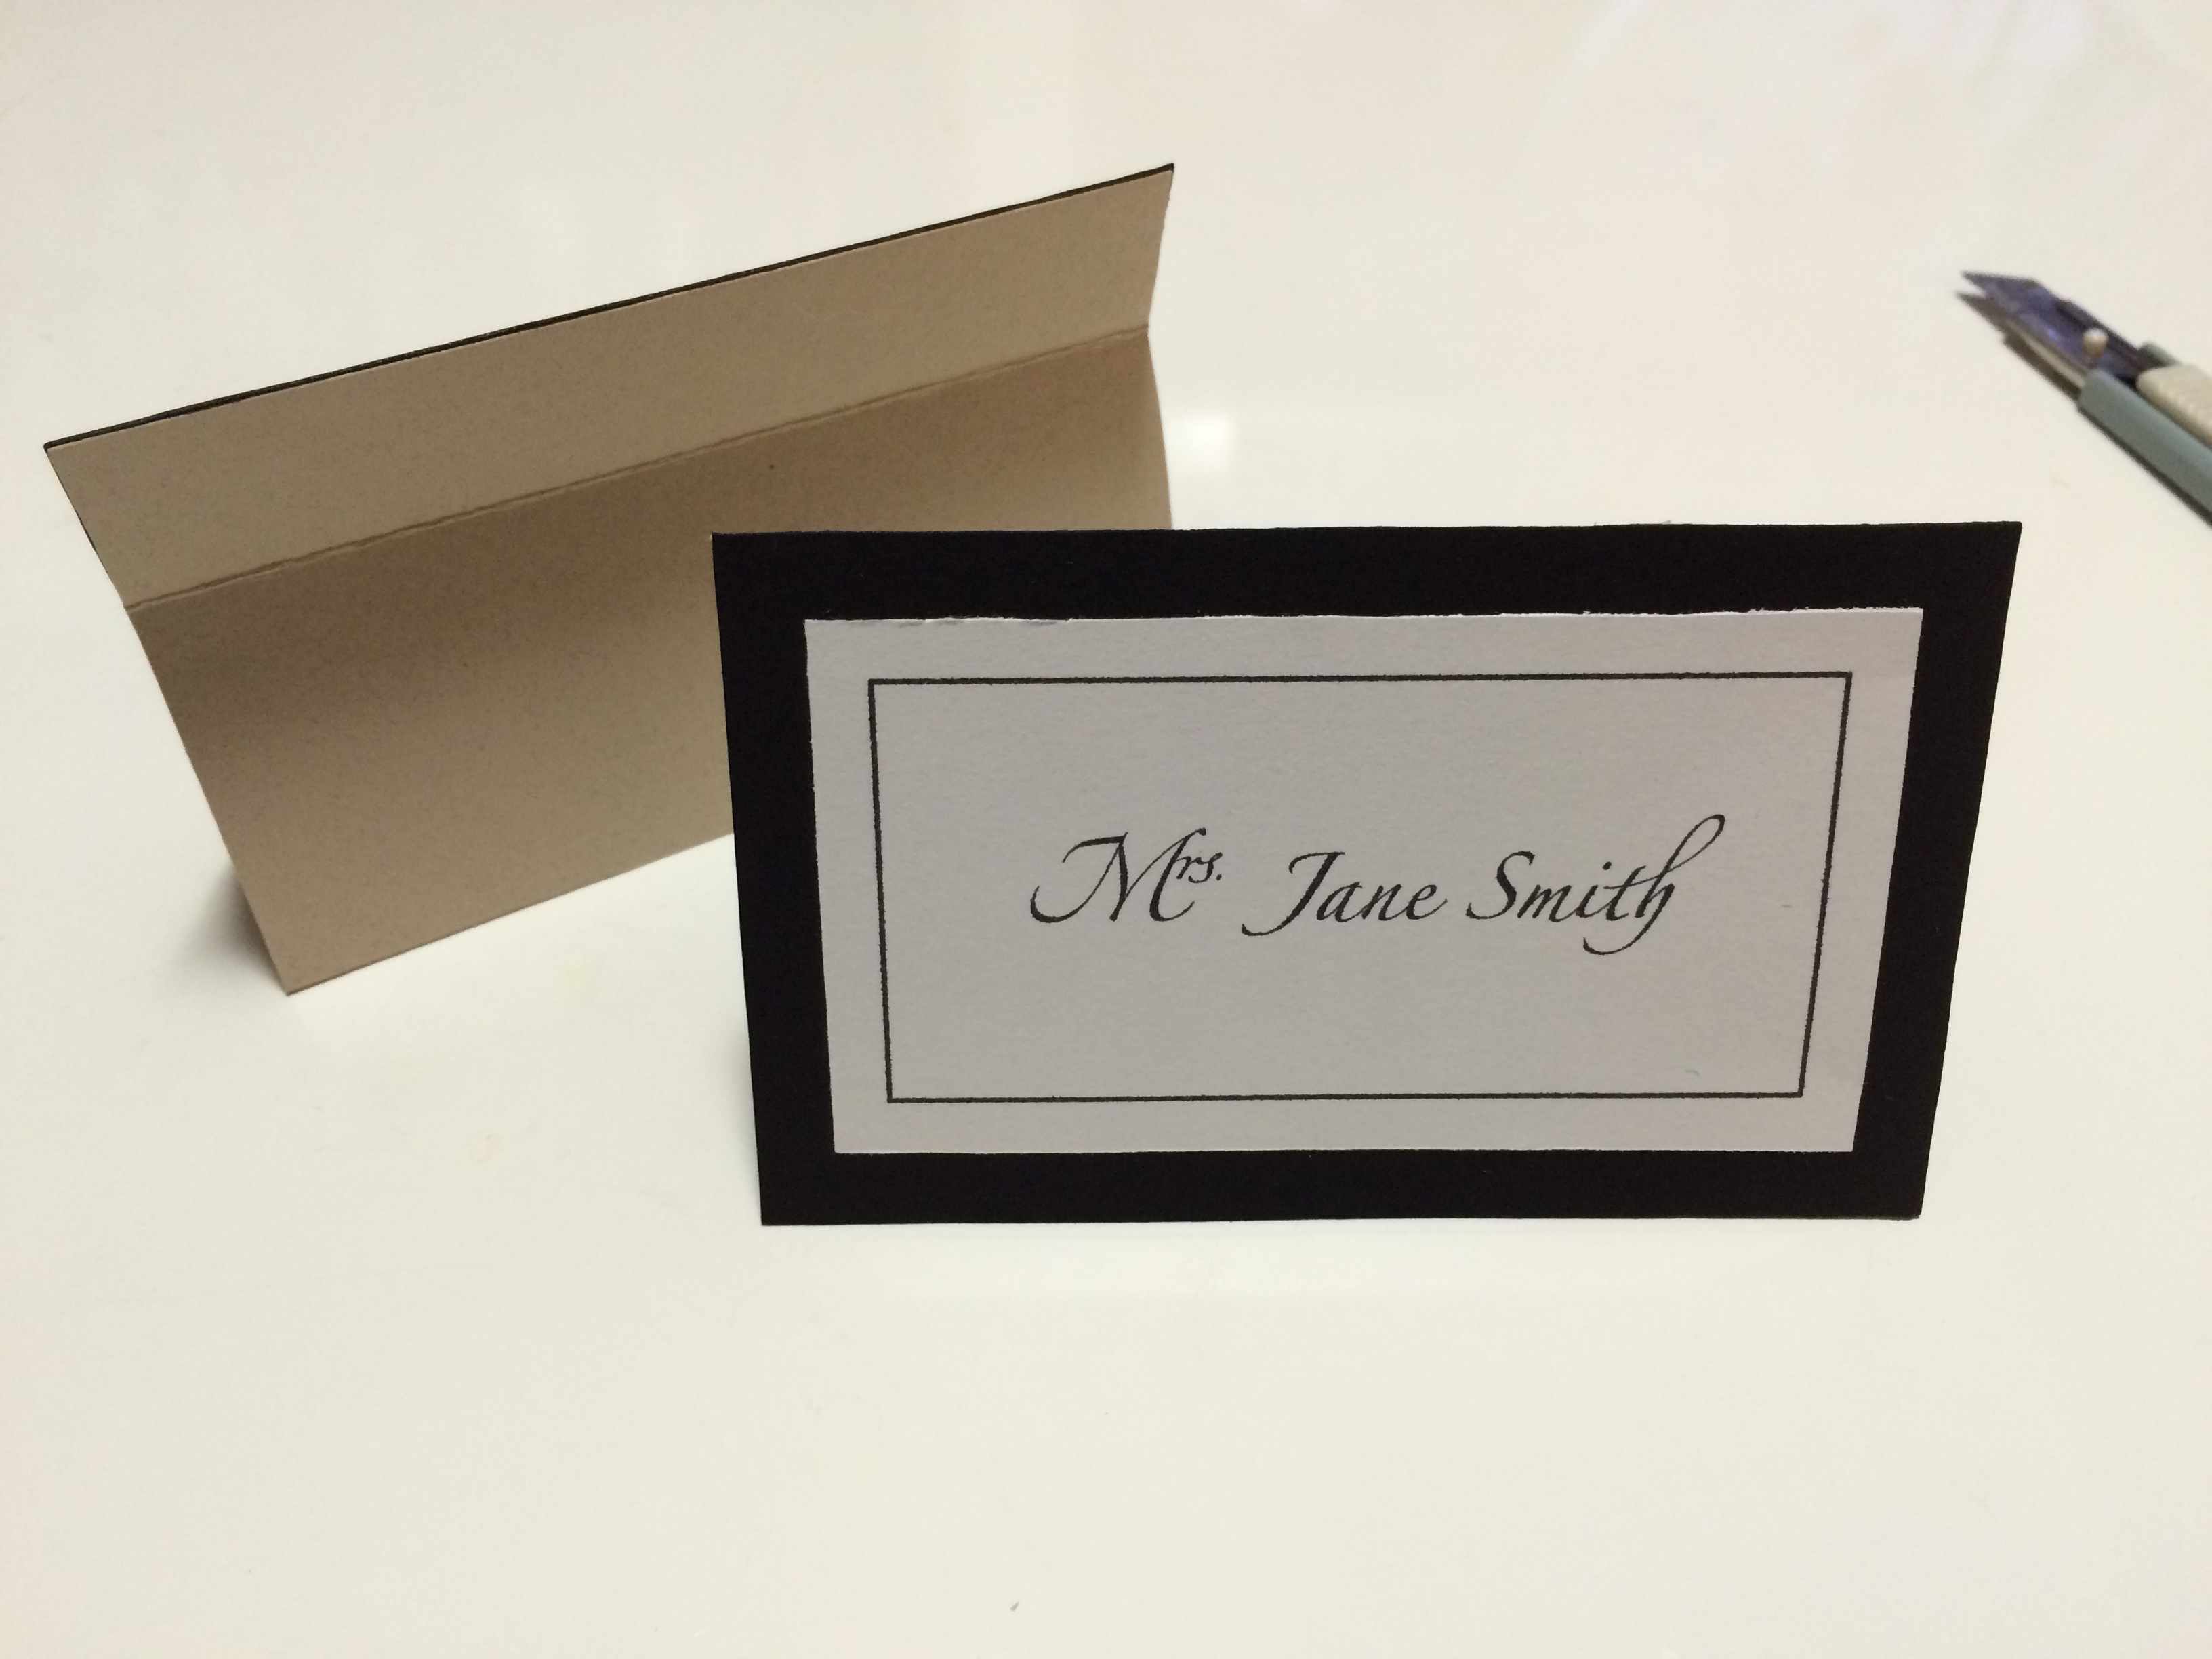
finished

[d.i.y.] super easy name placements

you’ve hit wedding crunch time and your guest list is finally finalizing. of course, this has to be at the last minute. if you can find a calligrapher at the last minute, that’s great, but you just don’t want to think about it and want to use the ol’ computer and printer for name placements. however, you still want your name placements to look great! here’s a d.i.y. for you!! (if your guest list is mostly finalized and you want to check this off your list earlier on, it doesn’t hurt to make some name placements for the “maybe”‘s and a few blank ones for last minute “i can make it!”‘s.)
結婚式の準備のラストスパート!ゲストリストが確定してやっと始められる準備の一つが席札。印刷会社に頼むのも時間とお金がかかるし、できればご家庭のパソコンとプリンターで済ませたいところ。もちろん、見た目もちゃんとしたいし・・・そこでこのDIYがオススメです!(ゲストリストがある程度確定していれば、お返事をいただいていないゲストの分も多めに作って早めにこの作業を終わらせる手もあります。また、念のため、何も書かれていない席札を多めに作っておくのもオススメです。)

LET’S START! / 始めよう!

the goods

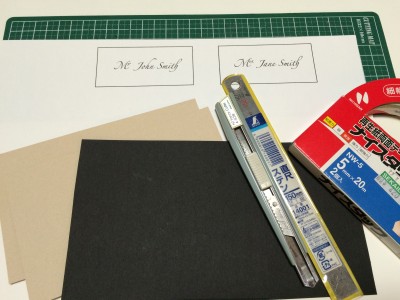
what you need / 材料:
card stock (optional: 2 types for front and back) / 厚紙または画用紙 (オプションとして表と裏で別々の紙を2種類)
printed names / 印刷されたネーム
cutting board / カッティングボード
cutter / カッター
(if available, a paper cutter will speed things up! pre-cut the names and card stock to size before hand (see below steps for sizes. front and back are the same size). / ペーパーカッターがあれば早いです!前もってネームと厚紙を人数分切り出しておくと、なお効率いいです。下記ステップに各サイズを表記しています。厚紙は、表裏共に同じサイズです。)
ruler / 定規
(i used a transparent sewing/patterning ruler (see step 1) to measure and cut simultaneously. / 透明のパターン用定規(ステップ1をご参照ください)を使うと測りながら切ることが出来て、スピードアップ出来ます。)
double stick tape / 両面テープ
cut out  names
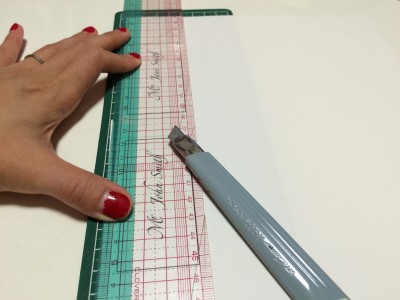
1. cut out the names to 8.7cm x 4.7cm/3 1/2in x 1 3/4in (i cut 5mm/1/8in around the rectangle using my patterning ruler). / 印刷されたネームを8.7cm×4.7cmに切る。(透明の定規を使って長方形の周り5mmでカットしました。)
double stick names
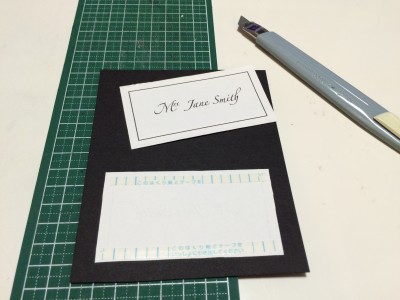
2. apply double stick tape to the backs of the names and apply to the center of the front card. / 両面テープをネームの裏に貼り、表になる厚紙の中心に貼る。
cut out card
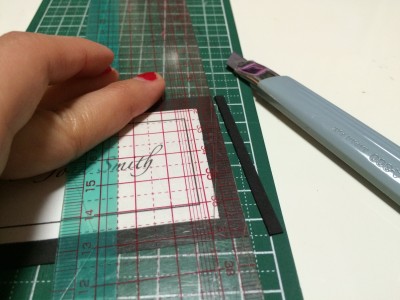
3. cut out the front card to 10cm x 6cm/4in x 2 3/8in (here i cut 7mm/1/4in around the name paper using the patterning ruler). / 表カードを10cm×6cmに切る。(透明定規を使用してネームの周囲7mmでカットしました。)
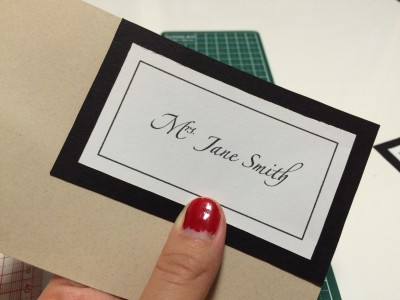
cut out backing
4. match the front card to a corner of the back card, and cut to the same size. / 裏紙の角に表カードを合わせ、表カードのサイズに合わせて切る。
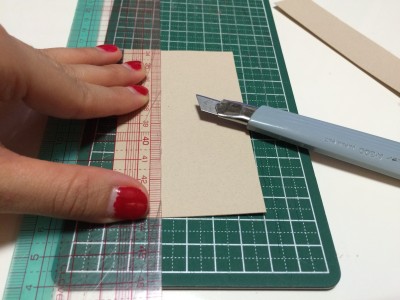
score backing
5. with a cutter, lightly score the back card 2cm/3/4in inside one of the longer sides. / カッターを使用して、裏カードを長い辺から2cm内側に軽〜く切り込みを入れる。
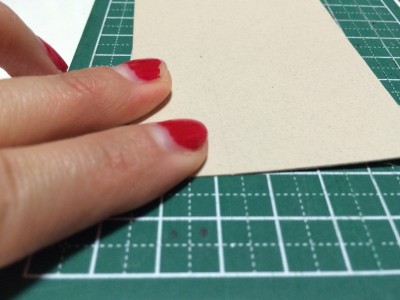
close up of score
here’s a close up of the score. / 切り込みのアップ。これくらい軽くでいいのです!
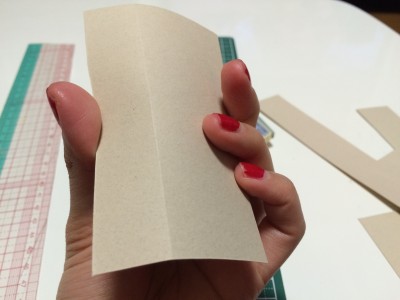
fold score
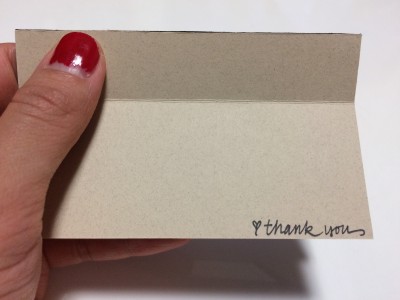
6. LIGHTLY fold score, with the cut side on the inside. / 優しく折り目を作る。切った面が内側の谷面になります。
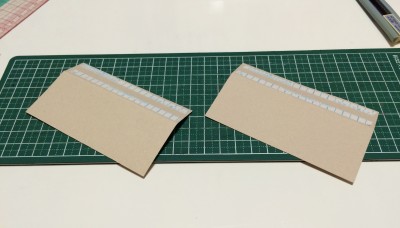
double stick backing
7. apply double stick tape to the thinner side of the score, again with the cut side facing down. / 山面になる側の細い部分に両面テープを貼る。
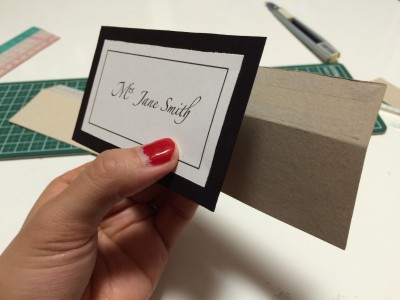
attach backing to card
8. attach the backing to the front card, making sure that the name card is facing right-side up, and aligning the taped end to the top back side of the name card. / 裏カードを表カードと合体する。その際に、表カードのネーム面を手前に向け、裏カードのテープ面が表カードの裏の上端に合わさるように貼ります。
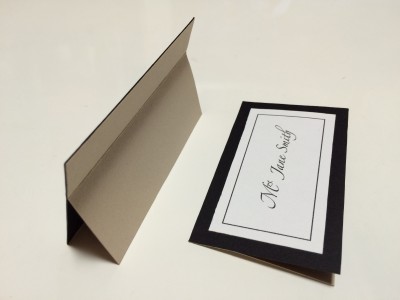
finished
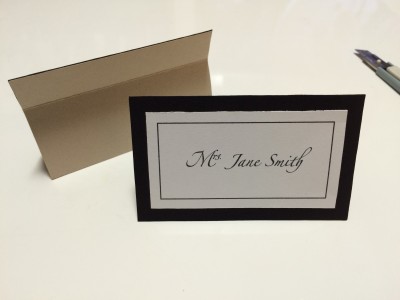
FINISHED! / 出来上がり!

it's flat!
this name card is great because it is easily flattened to lessen the load to take to your wedding reception! / この席札は、平にしやすい上、最低限の場所をとるので披露宴の荷物を詰めやすくします!

[side note / ちなみに]
regarding my printer & paper for d.i.y. wedding paper items
d.i.y.ウェディングペーパーアイテムで使用しているプリンターと紙について
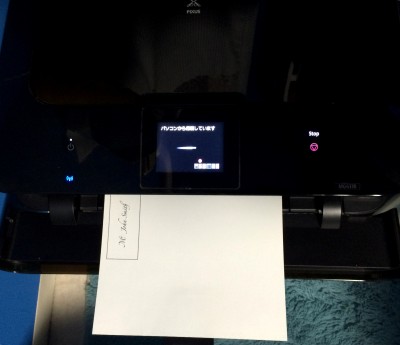
printer & paper
| my printerプリンター |
CANON PIXUS MG7530

an amazing purchase!! it prints both fine or fast, adjusts to many paper types, can print via wifi and from smart phones, and the quality is just great! for weddings, it’s best to print with a “fine printing” setting. it will look absolutely professional! / 重宝しています!ファインとスピーディで印刷設定を変えられ、様々な紙面に印刷できる上、wifiでスマホからも印刷できます。そして、何よりもクオリティが最高です!結婚式のためでしたら、ファイン設定がオススメです。

| aravealアラベール |
MY FAVORITE. i recommend it to all my customers for it’s supple texture and matte look. since i take orders for making name placements, i have my own batch that i order from this online shop and my computer prints perfectly on it. / お客様にいつもオススメしている紙です。表面の凹凸がさりげなく、なめらかでマットに仕上がります。席札のご注文をいただいているので、takeopaperさんから発注して常備しています。自宅のプリンターでも綺麗に印刷されます。

thank you

weddings and tools

my goodness, every week the days go by so fast! for this week’s #tbt #fbf, i want to take a little break and talk about my favorite work tools for handmade weddings.

毎週毎週、日にちが過ぎていくのが早すぎです!今週の #tbt #fbf は、ウェディングアイテムのご紹介というよりは、ハンドメイドウェディングに便利な道具をご紹介したいと思います。


a lot of the weddings i have been to have been overseas (in the states). and many times i am there to be the crafty one, so i have a small box of my favorite tools that i bring with me. others i improvise with what i can get locally or have at hand. here i show you the favorites and the ones that you wouldn’t think would be useful!

これまで参加した結婚式の半数は海外(アメリカ)で行われたものが多いです。そして、ほとんどの場合、ハンドメイドのお手伝いをする役目が多いのです。なので、毎回(念のため)私が作業に慣れているツールを持って行きます。それ以外のものは現地で調達したり、手元にあるものを使用します。ここで紹介するのは、定番アイテムと意外なアイテムをお見せします!

[WEDDINGS] TOOLS OF THE CRAFT (CUTTER CUTTING BOARD AWL
cutter | cutting board | awl
カッター | カッティングボード | 目打ち

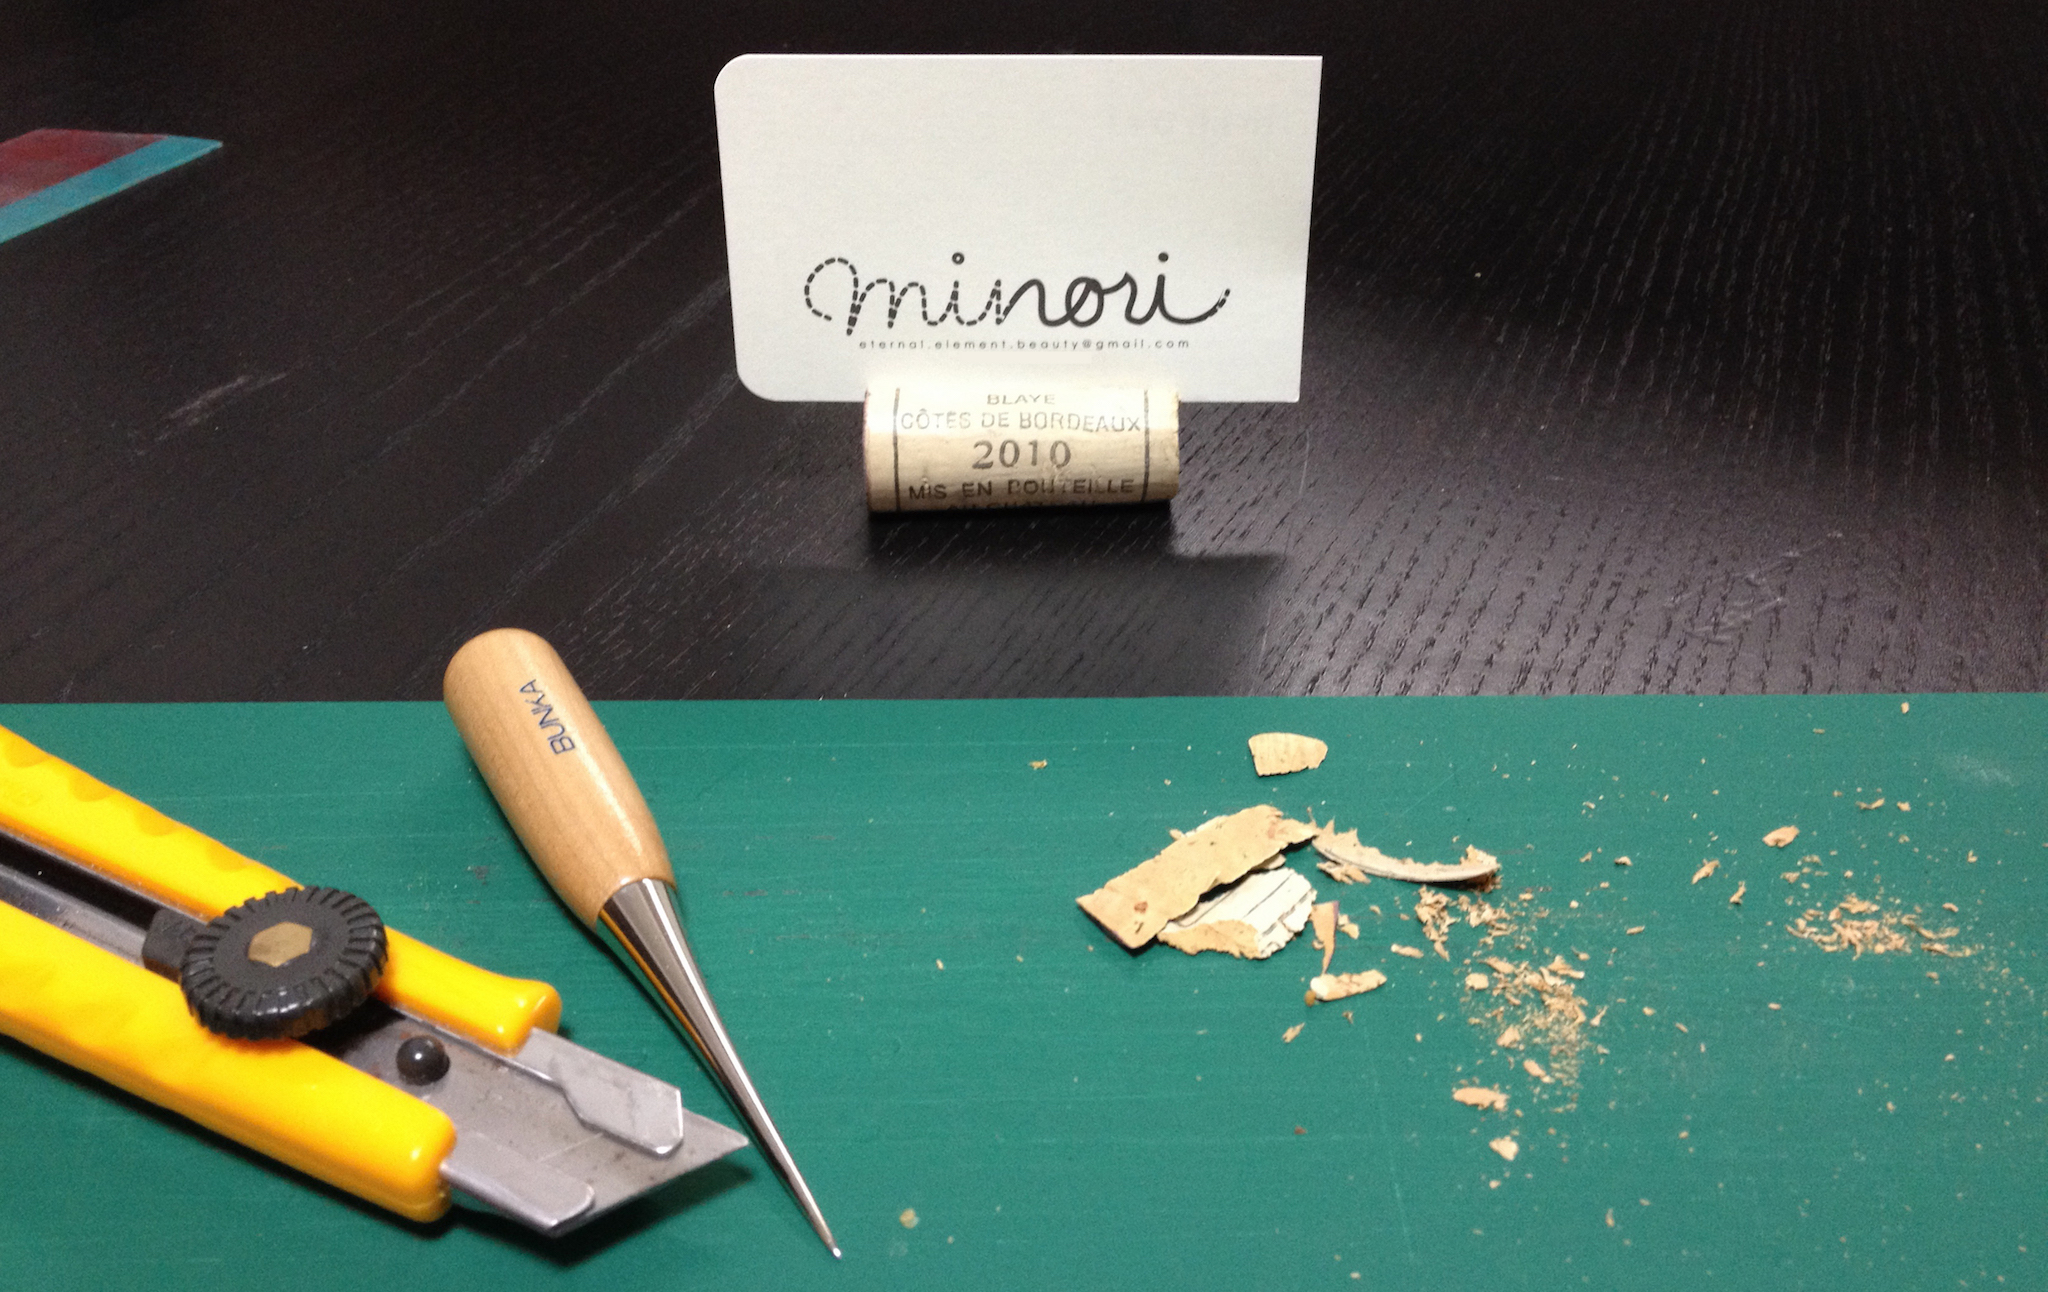
all-purpose cutter: which i use for more heavier duty materials like styrofoam boards or card stock and in this case to cut into a wine cork to make name placement stands.
なんでもカッター: 厚みのある材料に使用するカッターは、フォームボードやカード紙に最適。この場合は席札立てとなるワインコルクに使用しました。

the awl: i can’t even begin to explain how often i use my awl. although this one is for sewing, i also use it when perforating hand crafted cards and paper items. in this situation, it helped to widen the score in the name placement stands.
目打ち: 大好きな目打ち!元は裁縫用ですが、ハンドメイドカードやペーパーアイテムの穴あけなどによく使用しています。この場合はコルクの切り目を広げるために便利でした。

[WEDDINGS] TOOLS OF THE CRAFT (RULER & CUTTER)
metal ruler | cutter
直尺 | カッター

metal ruler: this is such a great ruler! it’s a shorter ruler which is great for measuring out smaller cards, such as name placements, or for designs on paper items. also they are great to use as a guide for cutting paper since they can’t get sliced like plastic rulers.
直尺: 短めな直尺は、特に小さめなカード(席札など)やペーパーアイテム上のデザイン寸法を計算するのにもかなり良いです。また、プラスチックと違って金属製のものは紙や布のカッティングガイドとして便利です。

cutter: this cutter i use for paper. it’s great because along with the metal ruler above, it’s a compact size that fits in my pencil case.
カッター: こちらは、紙用に使用しているカッター。こちらは直尺と一緒に筆箱にフィットするコンパクトサイズ。

[WEDDINGS] TOOLS OF THE CRAFT (SEWING)
sewing tools: aside from using them for crafts, sewing tools are great for wedding emergencies. if you can sew, bring your sewing tools to a wedding! i have needed sewing tools at two friends’ weddings. you never know what can go wrong, but the bride will always appreciate an extra needle and thread! and you don’t have to bring the entire pin cushion. just wrap a needle or two in some tissue along with a bobbin of white thread.
裁縫道具: ウェディングアイテム以外に結婚式の緊急事態ように裁縫道具は必需品!裁縫ができる方は、簡単な裁縫道具を結婚式に持っていくべき!これまで2人の友人の結婚式で必要になったことがありました。何が起きるか分からないのが結婚式(笑)、ご新婦様がきっと感謝してくれます。針山ごと持っていく必要はないので、針を1〜2本ティッシュに包んで白い糸をボビンに巻くなどでコンパクトに持ち歩けます。

[WEDDINGS] TOOLS OF THE CRAFT (GLUE)
glue: rubber cement may be great for gluing two pieces of thin paper or card stock together…. but from personal experience i feel that it’s not the most permanent of solutions. i’ve had many a time where the papers separated easily after a short period of time. for paper+paper, i prefer double stick tape which is much cleaner and less smellier.
although it can get messy, i love using elmer’s glue for many many items. the following are some examples.
糊: アメリカでは紙と紙の接着にゴム糊(ラバーシメント)が使用されることが多いように感じます。個人的にはオススメしません。結局、ゴムの接着力が弱まり、紙が剥がれるケースをよく見ます。紙と紙でしたら、私は両面テープを使うのが好きです。綺麗に仕上がり、使いやすく、臭わないのが利点です!
糊のお気に入りはアメリカで小学校などで使われるエルマーズグルー。日本ではクラフトボンドに近いと思いますが、水溶性で小さい子供が使えるほどかなり使いやすいものです。次のようなもので使用しました。

[WEDDINGS] CAKE TOPPER BOAT
[WEDDINGS] CAKE TOPPER BOAT
i used loads of elmer’s glue to make this popsicle stick boat/base for this cake topper. (how cute are the octopi??? the bride ordered them on etsy!) the foundation of this boat is a styrofoam block (not sure what it’s really for, but i found it in the artificial flower section at the local craft store), which i covered with kraft paper (to cover the spaces between the sticks).

ケーキトッパーのベースとなる船をクラフト用ポプシクル棒(アイスクリーム棒)で埋め尽くしました。(タコさん達はご新婦様が Etsy で注文したものです!)土台に使用しているのは発泡スチロールブロックを削ったもの、ポプシクル棒の隙間から発泡スチロールが見えないようにクラフト紙を先に糊付けしました。

[WEDDINGS] TOOLS OF THE CRAFT (GLUE)
here i used elmer’s glue to attach fabric to card stock and made this tuxedo hat. elmer’s glue or craft glue is great for porous materials like fabric or styrofoam, even wood, because the liquid can soak into the material and stick very well.
エルマーズグルーを使って、生地をカード紙に貼りました。それでタキシードハットを作成。クラフトボンド同様、ドロっとしたエルマーズは、木材、生地、発泡スチロールのような穴や隙間のある材料に液体が染み込んでいき、乾いたらなかなか外れない強度で仕上がります。

[WEDDINGS] TOOLS OF THE CRAFT (NAIL POLISH)
nail polish cap: i made this tiara out of wire (that i had just happened to be carrying in my toolbox) and this nail polish cap was the perfect size to mold it to!! who would’ve known!
マニキュアの蓋: ティアラをマニキュアの蓋に合わせてワイヤー(たまたまツール箱に入っていたのです・・)で作りました。まさかマニキュアがこういうところで使えると思いもしませんでした!

[WEDDINGS] GIFT DECORATION

[WEDDINGS] GIFT DECORATION

(^o^)/

mr. banana leaf and co.

my do the days go by quickly! this week for the #tbt #fbf post, i wanted to continue with mr. banana leaf and talk a little more about western and japanese weddings.

あっという間にもう金曜日!時が経つのがすごく早く感じる日々です。今週の #tbt #fbf ブログは、先週に続けてバナナリーフくんウェディングをご紹介します。また、欧米と日本の結婚式についてお話します。

in western weddings, a typical wedding day would proceed something like the following:
● wedding ceremony
● cocktail time
● reception
● dancing
and in most cases guests attend throughout the day.

欧米の結婚式では、ウェディングのスケジュールは次の様になります:
● 結婚式
● カクテルタイム
● 披露宴
● ダンスタイム
そして、1日を通して同じゲストが参加されることが多いです。日本の様に結婚式の『二次会』の習慣はあまりなく、披露宴会場にダンスフロアが設置されそこでお食事を終えたらダンスパーティーに変わるのです。

in japan, the wedding day is very similar except “dancing” is turned into a completely separate event called the nijikai (the after party) and many times is at a different venue. another exception is that it is common for the bride and groom to invite only family and/or very close friends to the ceremony and reception. friends and work acquaintances would be invited to the nijikai. why the separate guest list?:

in japan, it is customary for a wedding guest to bring a monetary gift of 30,000 yen (if $1.00=100 yen, 30,00 yen would be $300). the reason being, even numbers (i.e. 20,000 yen) are considered bad luck since you can “split” the couple in half, not to mention the number 4 is bad luck as it can be pronounced the same way as “death”. of course one may think, “30,000 yen is an even number”, but in japanese 10,000 is 1 man (rhymes with fawn), so 1 man, 2 man, 3 man. if you are family or a work superior the next level up would be to give 5 man. for a nijikai, many times they ask for an entrance fee in the place of a monetary gift. there are many reasons as to how and why a couple separate their guest list, but one big factor could be so as not to burden friends and acquaintances with having to provide so much money.

[WEDDINGS] MR. BANANA LEAF AND CO.
photo provided by the bride

that said, for the mr. banana leaf wedding, they decided to incorporate mr. banana leaf’s friends into the nijikai pamphlet. the inside of the pamphlet opens up into a color coded “map”. the guests were handed different colored ribbons according to how they know the bride and/or groom (friend, work, college etc.) and each color (and a different mr. banana leaf friend in each circle) on the “map” explains its corresponding ribbon color.

そこで、バナナリーフくんウェディングでは、二次会にバナナリーフくんの仲間が出現したのです!二次会では、ゲストに別々のカラーのリボンが渡され、パンフレットには各色のゲストと新郎新婦の関係(幼なじみ、大学時代の友人、お仕事仲間など)の説明が書かれているのです。一つ一つの円の中には、バナナリーフ仲間がいるのです!

THANK YOU!

[WEDDINGS] MR. BANANA LEAF AND CO.
mr. banana leaf thank you stickers for gift bags

mr. banana leaf

[WEDDINGS] MR. BANANA LEAF

it’s that time of week to introduce another wedding item i’ve made in the past in honor of #tbt #fbf! i love love love working on wedding items, be it paper, fabric, ribbon, crafts, anything.  being able to communicate with a couple who is ready to take their first big step together makes me equally as happy for them and in turn, myself.

this couple got married on november 22nd (11/22), a date also known as “the good (married) couple’s day”, as 11-22 can be read as ii-fuu-fu (the good husband and wife).  the two live in singapore for the husband’s job but held their wedding in japan.  since i make fully one-of-a-kind custom order items, most of the couples i work with have a very clear image of their wedding.  these two were one of them.  (aside from the items i made, the bride also worked on many other items, and like many a bride and groom, they worked on it until the very day of the wedding.)

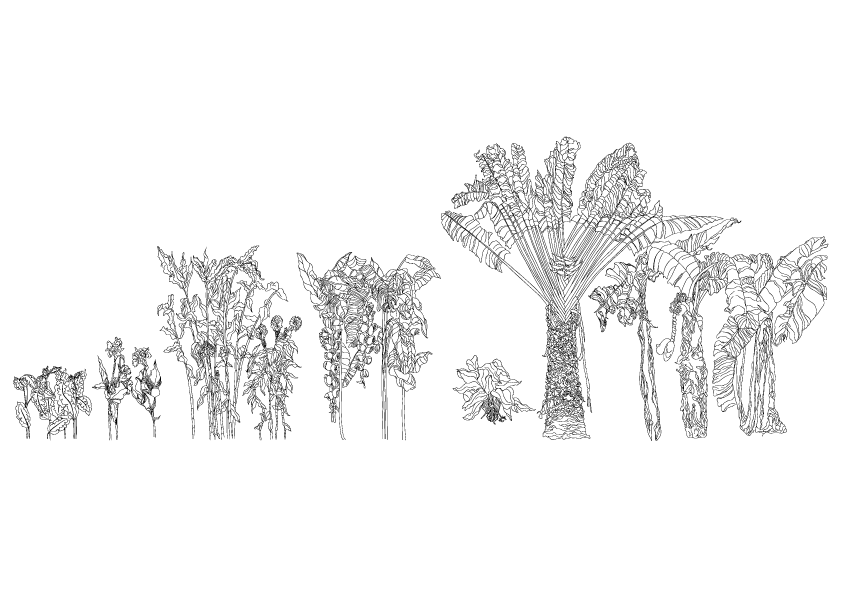
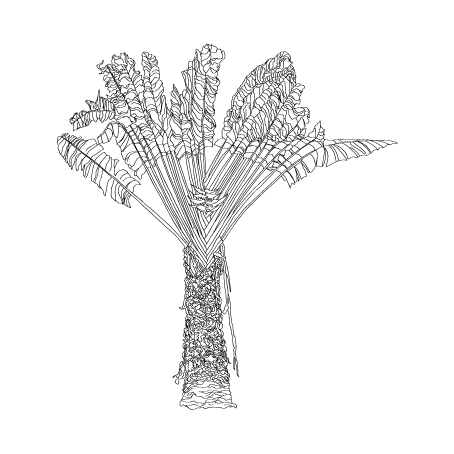
their paper items (programs, name cards, thank you stickers, and after party flyers) were inspired by an illustration on an outdoor bathroom wall in the Singapore Botanic Gardens.  they had asked me to recreate this wall, which was a very large amount of work, but definitely well worth it with their ecstatic reactions.  the tallest and their favorite of the trees/plants on the wall was Mr. Banana Leaf, which became their “official” wedding logo.


今週もこの日が来ました!過去のウェディングアイテムを紹介する #tbt #fbf ブログ。ウェディングに携わるのは、本当に幸せいっぱいな気持ちになるので、大大大好きなお仕事なのです!ペーパーに限らず、ファブリック、リボン、クラフトを使って私の大好きな『デザイン+手作り』に幸せな要素が加わるのですから。カップルが夫婦としての一歩を踏み出す日のためのご希望のイメージやアイデアを思う存分に教えてくださり、たくさんのコミュニケーションを交わしながら思い通りのアイテムに仕上げて行くのが私のお仕事。

今回のカップルは昨年の11月22日(いい夫婦の日)にご結婚されました。ご新郎のお仕事でシンガポールに滞在されており、ご結婚式は日本で挙げられました。完全オリジナルのデザインをしていると、ほとんどのお客様は、はっきりとしたイメージを持たれており、このお二人ももちろんその中。私が作ったアイテムの他に、たくさんのアイテムはご新婦様が考えられ、お二人で当日までガッツリ製作されていたようでした!

作ったアイテムは:席次表/メニュー/プロフィールを含めたウェディング冊子、席札、引き出物バッグのサンキューシールと二次会のフライヤー。その中心的存在となったのは、バナナリーフ君。シンガポール・ボタニカル・ガーデンズのお手洗いの壁に描かれた植物のイラストを再現し、植物達の中でも一番ご新郎様、ご新婦様が惚れ込んだのはバナナリーフ君なのです。再現するのにかなり手がかかったのですが、お二人のリアクションをいただいたら、本当にやりがいを感じました!!

from this / この壁から:

[WEDDINGS] MR. BANANA LEAF

to this / このイラストに:

[WEDDINGS] MR. BANANA LEAF

here is their wedding reception pamphlet!
this pamphlet includes the couple’s profiles, menus, and the seating chart
(sekijihyo as mentioned in a past post).
こちらがウェディング冊子!
席次表、メニューとプロフィールが入っています。

[WEDDINGS] MR. BANANA LEAF

The fork and knife on this menu are original vector works. / フォークとナイフはオリジナルです〜

[WEDDINGS] MR. BANANA LEAF

[WEDDINGS] MR. BANANA LEAF

s+h wedding items

–   H A P P Y   F R I D A Y ! !   –

this week’s #tbt #fbf post is the final one of the S+H series. i will be introducing the miscellaneous pieces that i made! it was such an honor to be asked to work on this wedding and it will always remind me why i enjoy helping in the preparation of wedding events.

今週の #tbt #fbf は S+H シリーズ最終になります!これまではペーパーアイテムを中心にご紹介しましたが、今回はその他のものをご紹介します。この結婚式に携われて本当に光栄で、改めて振り返るとウェディングイベントのお手伝いをする楽しみを思い出しました♫


–  t h e  g u e s t b o o k  –

[WEDDING] S+H LOGO WEDDING GUEST BOOK

[WEDDING] S+H LOGO WEDDING GUEST BOOK

the couple had found guestbook inserts at a store, but wanted to change the cover to match their wedding theme and colors. so i made use of my high school book binding class, and sewed together some linen and cotton twill to make this cover.

まずは、ゲストブック!ゲストブックの中身は既成のものを使用しましたが、カバーをもう少しお二人らしくしたく、ウェディングカラーに合わせて既成のカバーに手を加えました。生地はナチュラルなリネンとオレンジのコットンツイルを縫い合わせました。

–  d o g  c o l l a r s  –

[WEDDING] S+H LOGO WEDDING DOG COLLARS

there were three dogs in the wedding party. mr and mrs S+H had a dog named Sakura (whom has sadly passed away, but is now looking over them in heaven) and two of the bride’s dogs from home. the white one was a tuxedo collar for the boy dog, and the orange ribbon’s for the girls.

S+H ウェディングには、3匹のワンちゃんが参列されました。新郎新婦の愛犬のさくらちゃんとご新婦さまのご実家のワンちゃん2匹です。(優しくておっとりしたさくらちゃんはその後亡くなられましたが、今は天国からまんべんの笑みで見守っている事と思います!)白いタキシードの首輪は男の子用、オレンジのリボンは女の子用です。

–  t h e  w e l c o m e  b o a r d  –

[WEDDING] S+H LOGO WEDDING WELCOME BOARD

this is a mock-up of the welcome board / seating chart. i covered a board with the linen used for the guestbook, and printed the table letter labels on muslin. the photos are the groom’s own photography (i totally think he should be a professional photographer! who’s with me??) and you can see their beloved Sakura in one of the photos. see the following photo for a better look! i used green cord (also used to bind their wedding programs seen in my past post) to decorate.

ウェルカムボード兼シーティングチャートの下書きになりますが、実物は木の板にゲストブックと同じリネンを貼り、コットントワルに印刷したテーブルアルファベットと写真を縫いつけました。写真はご新郎さまが撮られたものになります。(プロの写真家並みのお写真ばかりなんです!!)中にはさくらちゃんもいます!次のお写真をご覧ください。また、前回のブログでお話ししました式次第と同じ深緑のコードを使用して飾り付けしました。

–  t a b l e  l e t t e r s  –

[WEDDING] S+H LOGO WEDDING TABLE NUMBER CARDS (for guests)

here are the table letter cards handed to guests. on the backs of these cards are a simplified map of the venue. / ゲストの皆さまにお渡しされたテーブルアルファベットになります。裏面には会場のマップを印刷しました。

–  t h e  m e n u  –

[WEDDING] S+H LOGO WEDDING LETTERPRESS MENU

[WEDDING] S+H LOGO WEDDING LETTERPRESS MENU

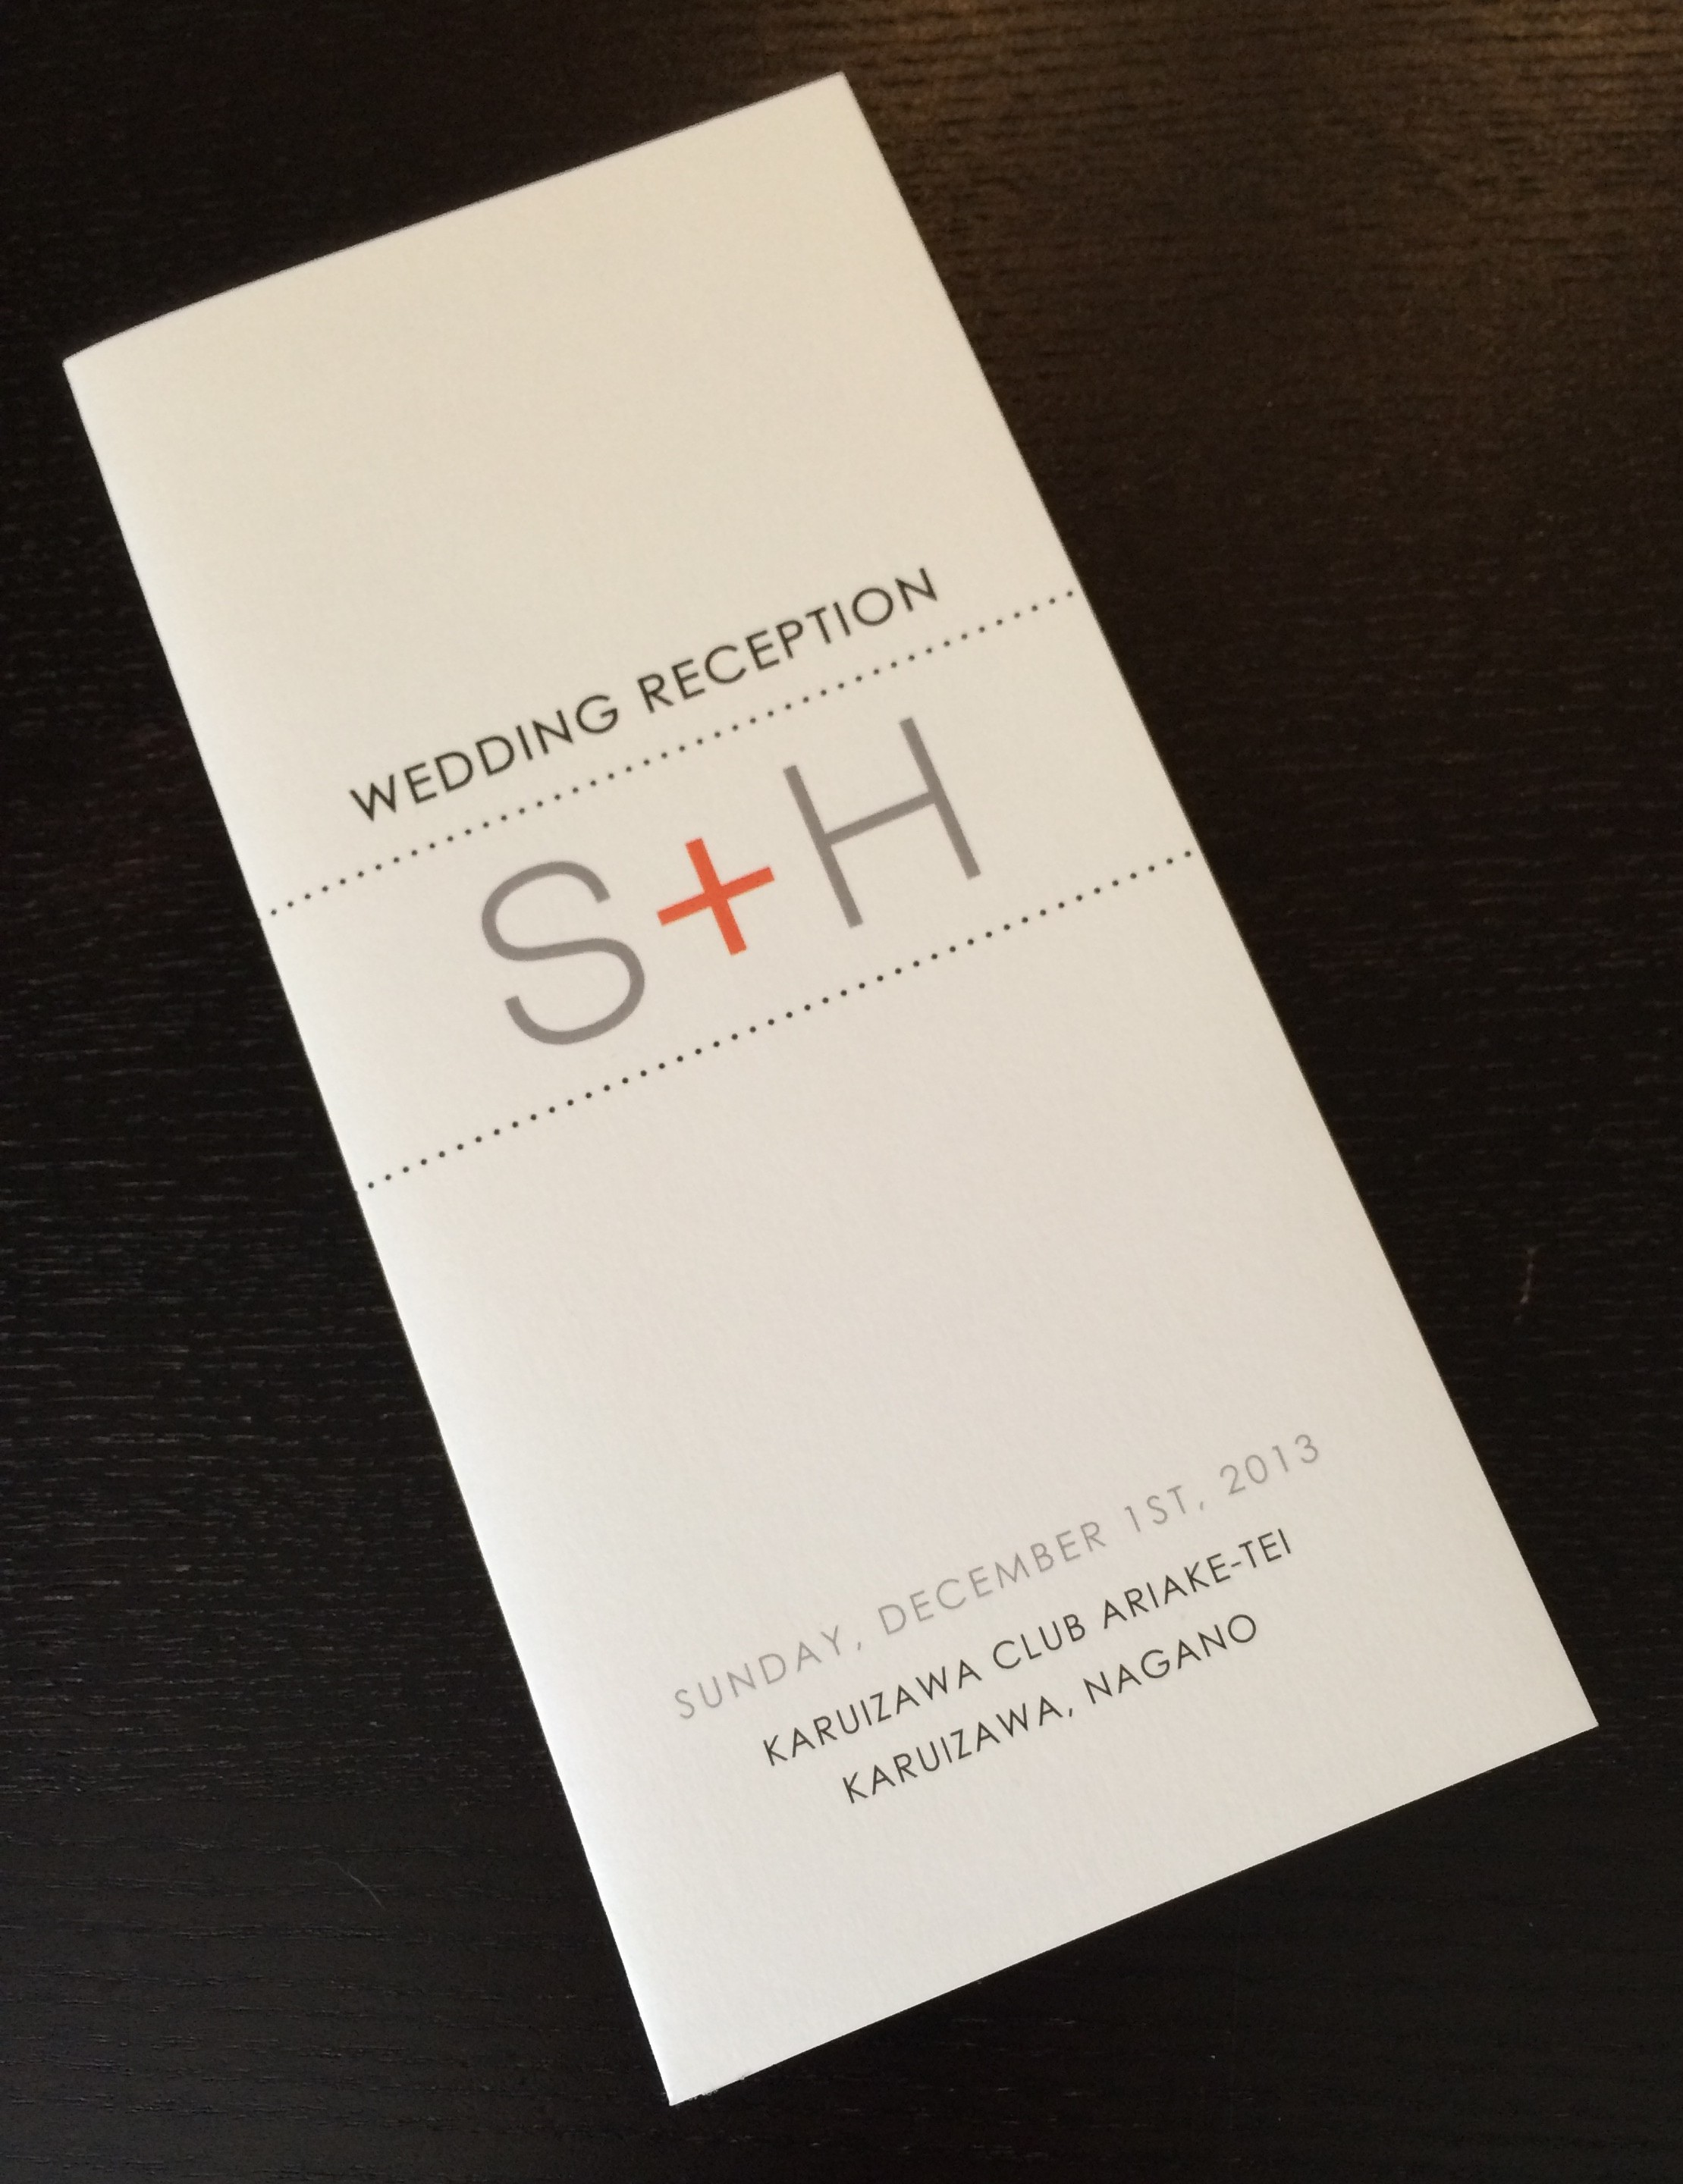
here we have the menus. likewise with the previously mentioned invitations and programs, letterpress brings warmth and depth to a simple design. / こちらはS+Hさんの念願の活版印刷メニュー。招待状と式次第と同様、活版印刷の存在感と温かみを活かした厚紙を使用しております。

–  f a v o r  g i f t b a g s  –

[WEDDING] S+H LOGO WEDDING GIFT BAGS

[WEDDING] S+H LOGO WEDDING GIFT BAGS

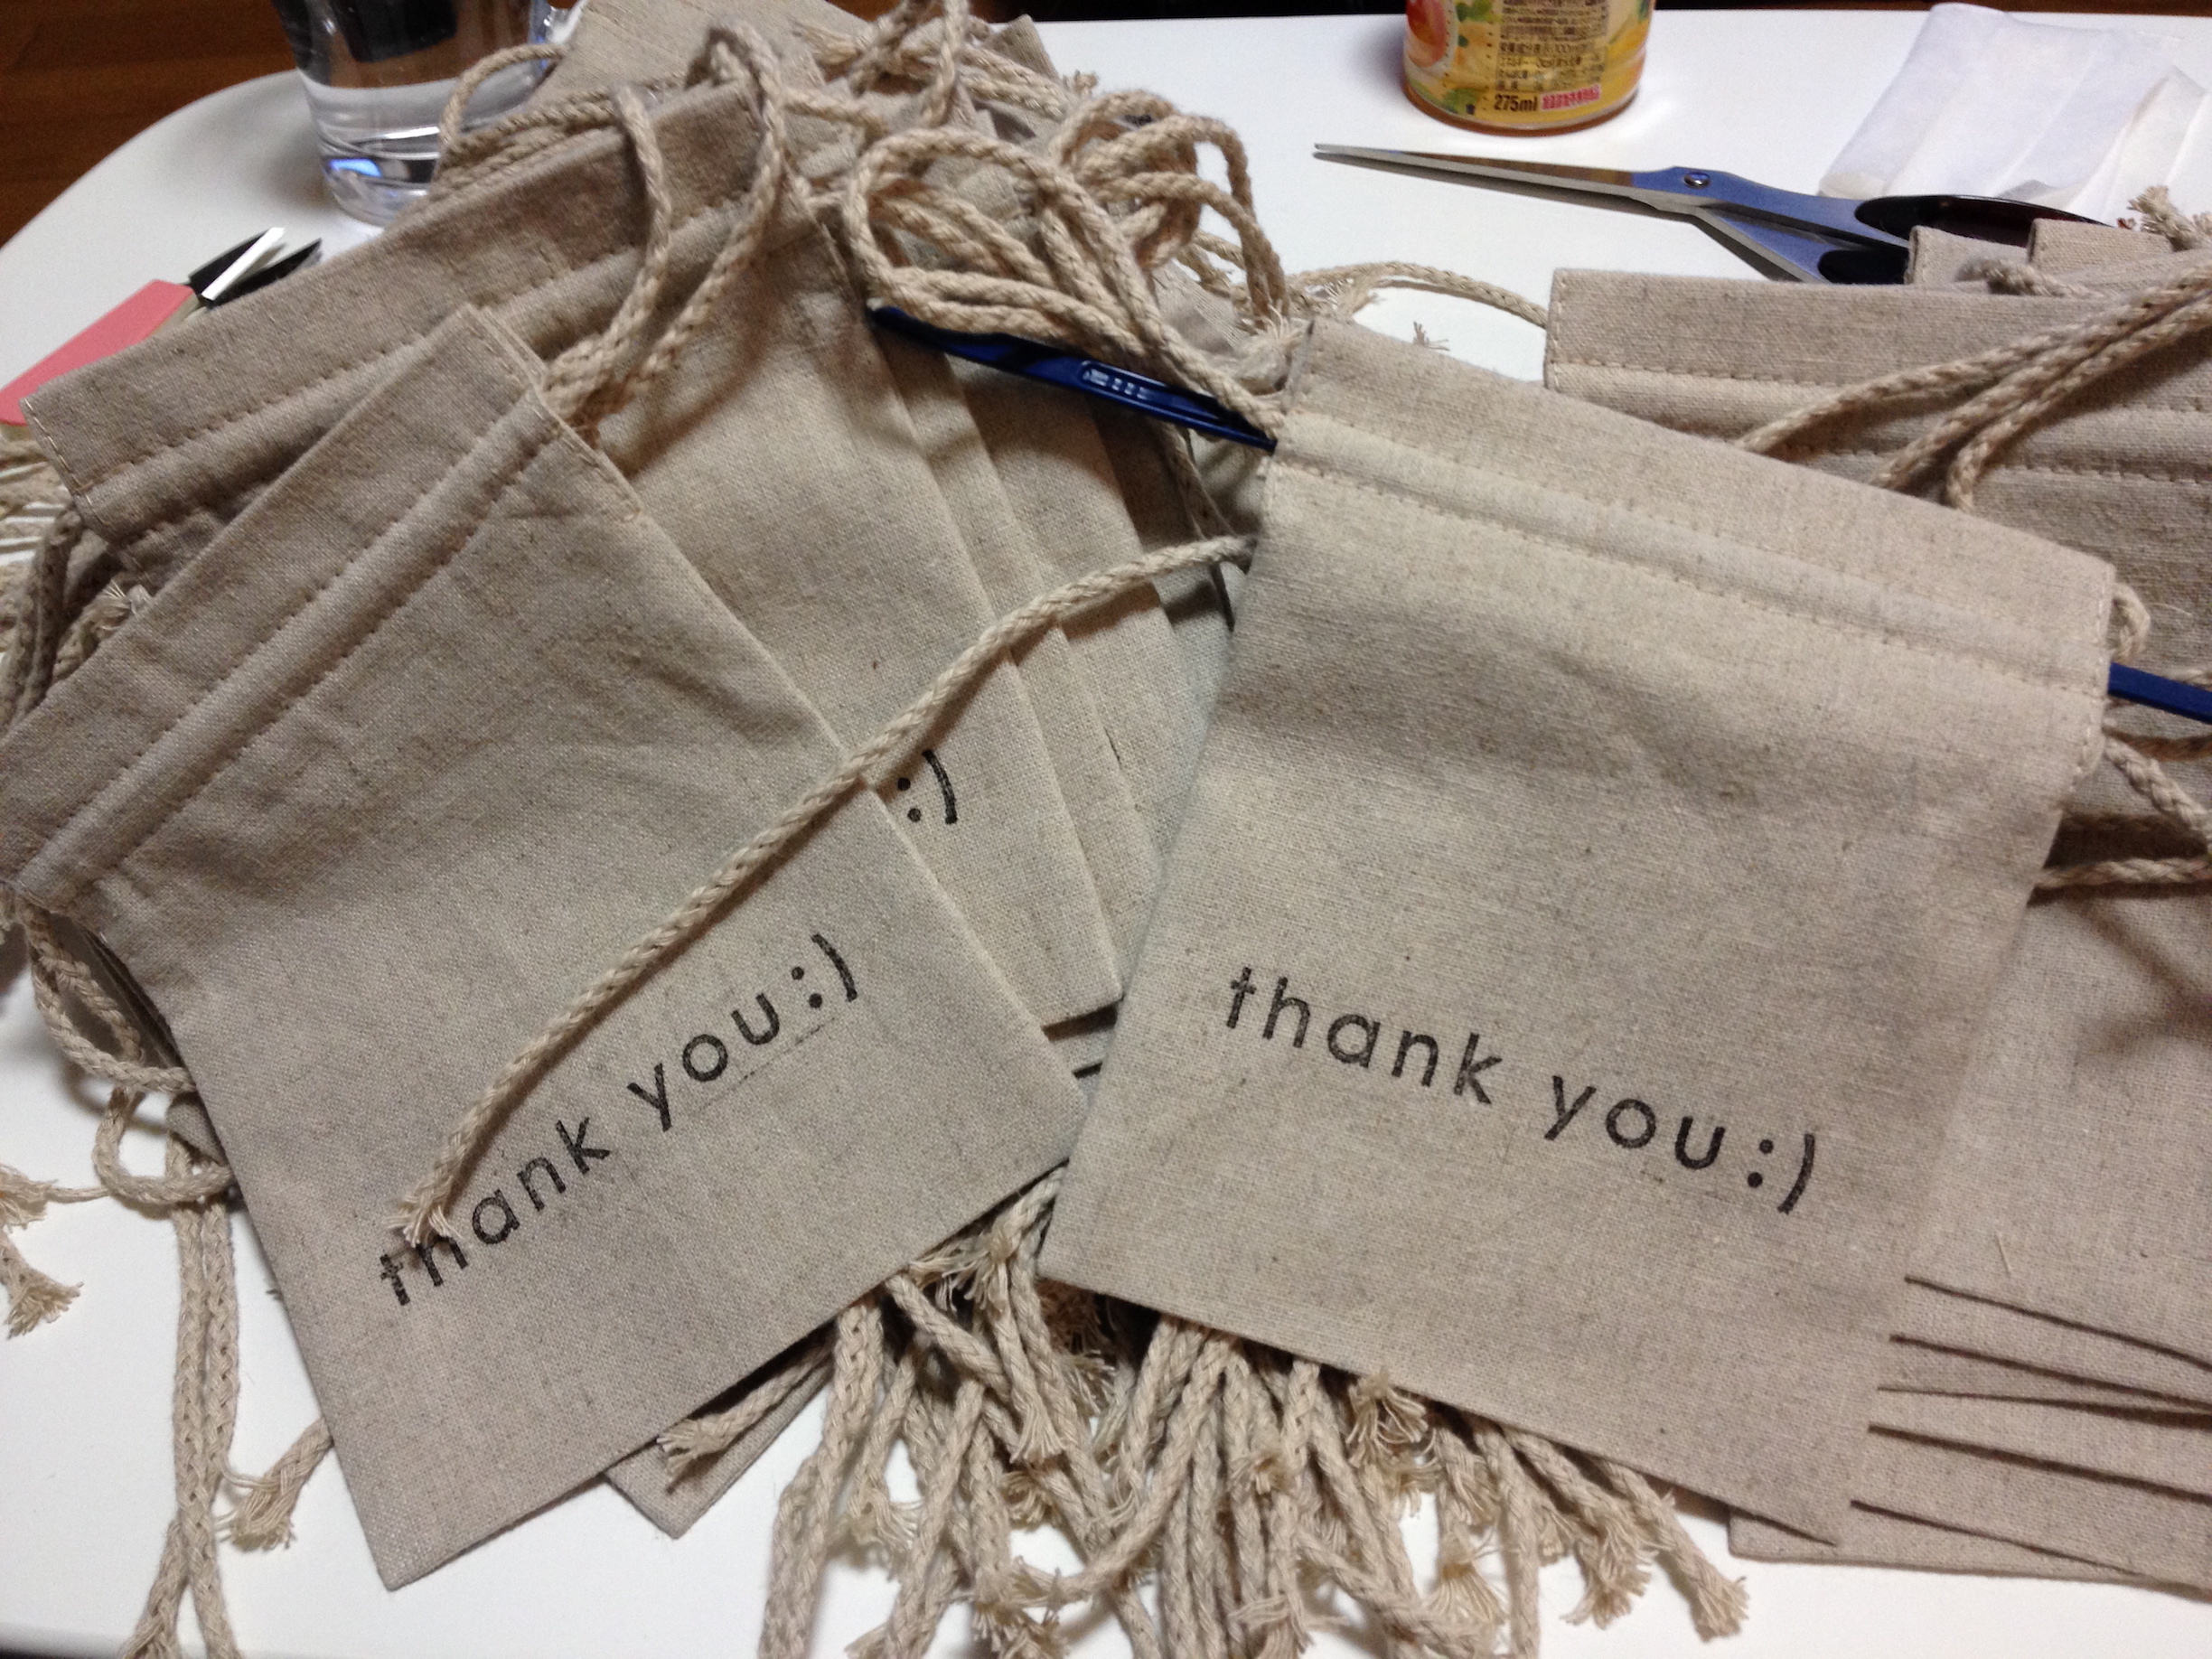
yes! these are handmade gift bags! i also designed these stamps and used fabric-safe ink to stamp each one. to have a truly handmade / homemade wedding brings such happiness and feeling to the special occasion. it was a lot of work, but to see their happiness was definitely worth every seam!

ハンドメイドのプチギフト巾着袋。スタンプもデザインしており、生地用のインクで一つ一つスタンプしました。ハンドメイドの結婚式は本当にゲストの皆さまに幸せと感謝の気持ちが伝わり、ただでさえ特別な日をより一層スペシャルな一日にしてくれます。たくさん作るのは確かに大変ではありますが、お客様の喜びを目の当たりにするとやりがいがあるのです。

S  M  I  L  E    L  U  V

s+h wedding reception seating chart

i can’t believe it’s already been a week since last friday!!! this past week was “golden week” in japan, where a string of national holidays + the weekend make an extended vacation week. i try not to leave the house during this time, because out-of-towners from all over japan and the world crowd the whole city. in fact i always recommend to friends planning to visit from overseas to avoid this time of may. that said, since it is officially friday in japan, here’s this week’s #tbt #fbf post! explaining something a little different at japanese weddings.

今日はもう金曜日!!ゴールデンウイークもあってか今週もまたまたあっという間に過ぎてしまいました!毎年GW中は混雑を避ける為お出かけを控えるのですが、今年は2度都内に出かけました。ちょうど数年前に比べて外国人観光客が増えたかも〜と思っていたら、ニュースでも今年は観光客が増えたことを言っていました!外国の友人が日本へ遊びに来る時は、GWだけは避けた方が良いよーと伝えるのですが、今回、外国の観光客の方々を見て、人混みの多い都会を楽しむのも東京の観光ポイントの一つかもしれないですね!というところで、今週の #tbt #fbf は、欧米の結婚式と違う日本の結婚式で見られるある事です。

[WEDDING] S+H LOGO WEDDING SEKIJIHYO

first, to explain a little about seating charts in japan. in western weddings, a seating chart may be found at the entrance into the wedding reception and guests find or are handed a name card with the table number of where to sit. in japan, all guests are handed something called a sekijihyo (or “seating chart”), which tells them exactly where to sit (not only the table number but also the exact seat, at which their name card will already be placed). this seating chart has all the guests’ full names, relation to the bride and/or groom, and if the guest is a work acquaintance, their job title as well.

欧米の結婚式で見られないのは『席次表』を渡される事です。欧米の『席次表』は、披露宴の入り口に大きくポスターやウェルカムボードの形をしたものが置いてある事が多いです。ウェルカムボードの近くにはゲストのネームカード(席札)がずらーっと並べてあり、テーブル番号ごとに並べてあったりします。それを持って、指定のテーブルへ行って座る位置を自分で選ぶ事が多いです。(もしくは、指定のテーブルのセンターにネームカードが置いてあり、自分で選んだ席にネームカードを置く事もあります。)ゲストの肩書きや新郎新婦との関係が書かれる事は無く、相手の事を知らない要素が他人との会話をスタートさせるきっかけになるのだと思います。

[WEDDING] S+H LOGO WEDDING SEKIJIHYO
[WEDDING] S+H LOGO WEDDING SEKIJIHYO

no matter the country or culture, the great thing about being a wedding item designer is that i can be creative, have fun, and see my clients and their guests enjoy the creativity.

最終的には、国や文化が違っても、ウェディングアイテムデザイナーとして一番楽しいのは、創造力を発揮できお客様とそのゲストの方々がそれをエンジョイしていただける事です。

S  M  I  L  E    L  U  V

[d.i.y.] tulle veiled wedding programs

[WEDDING] TULLE WEDDING PROGRAMS
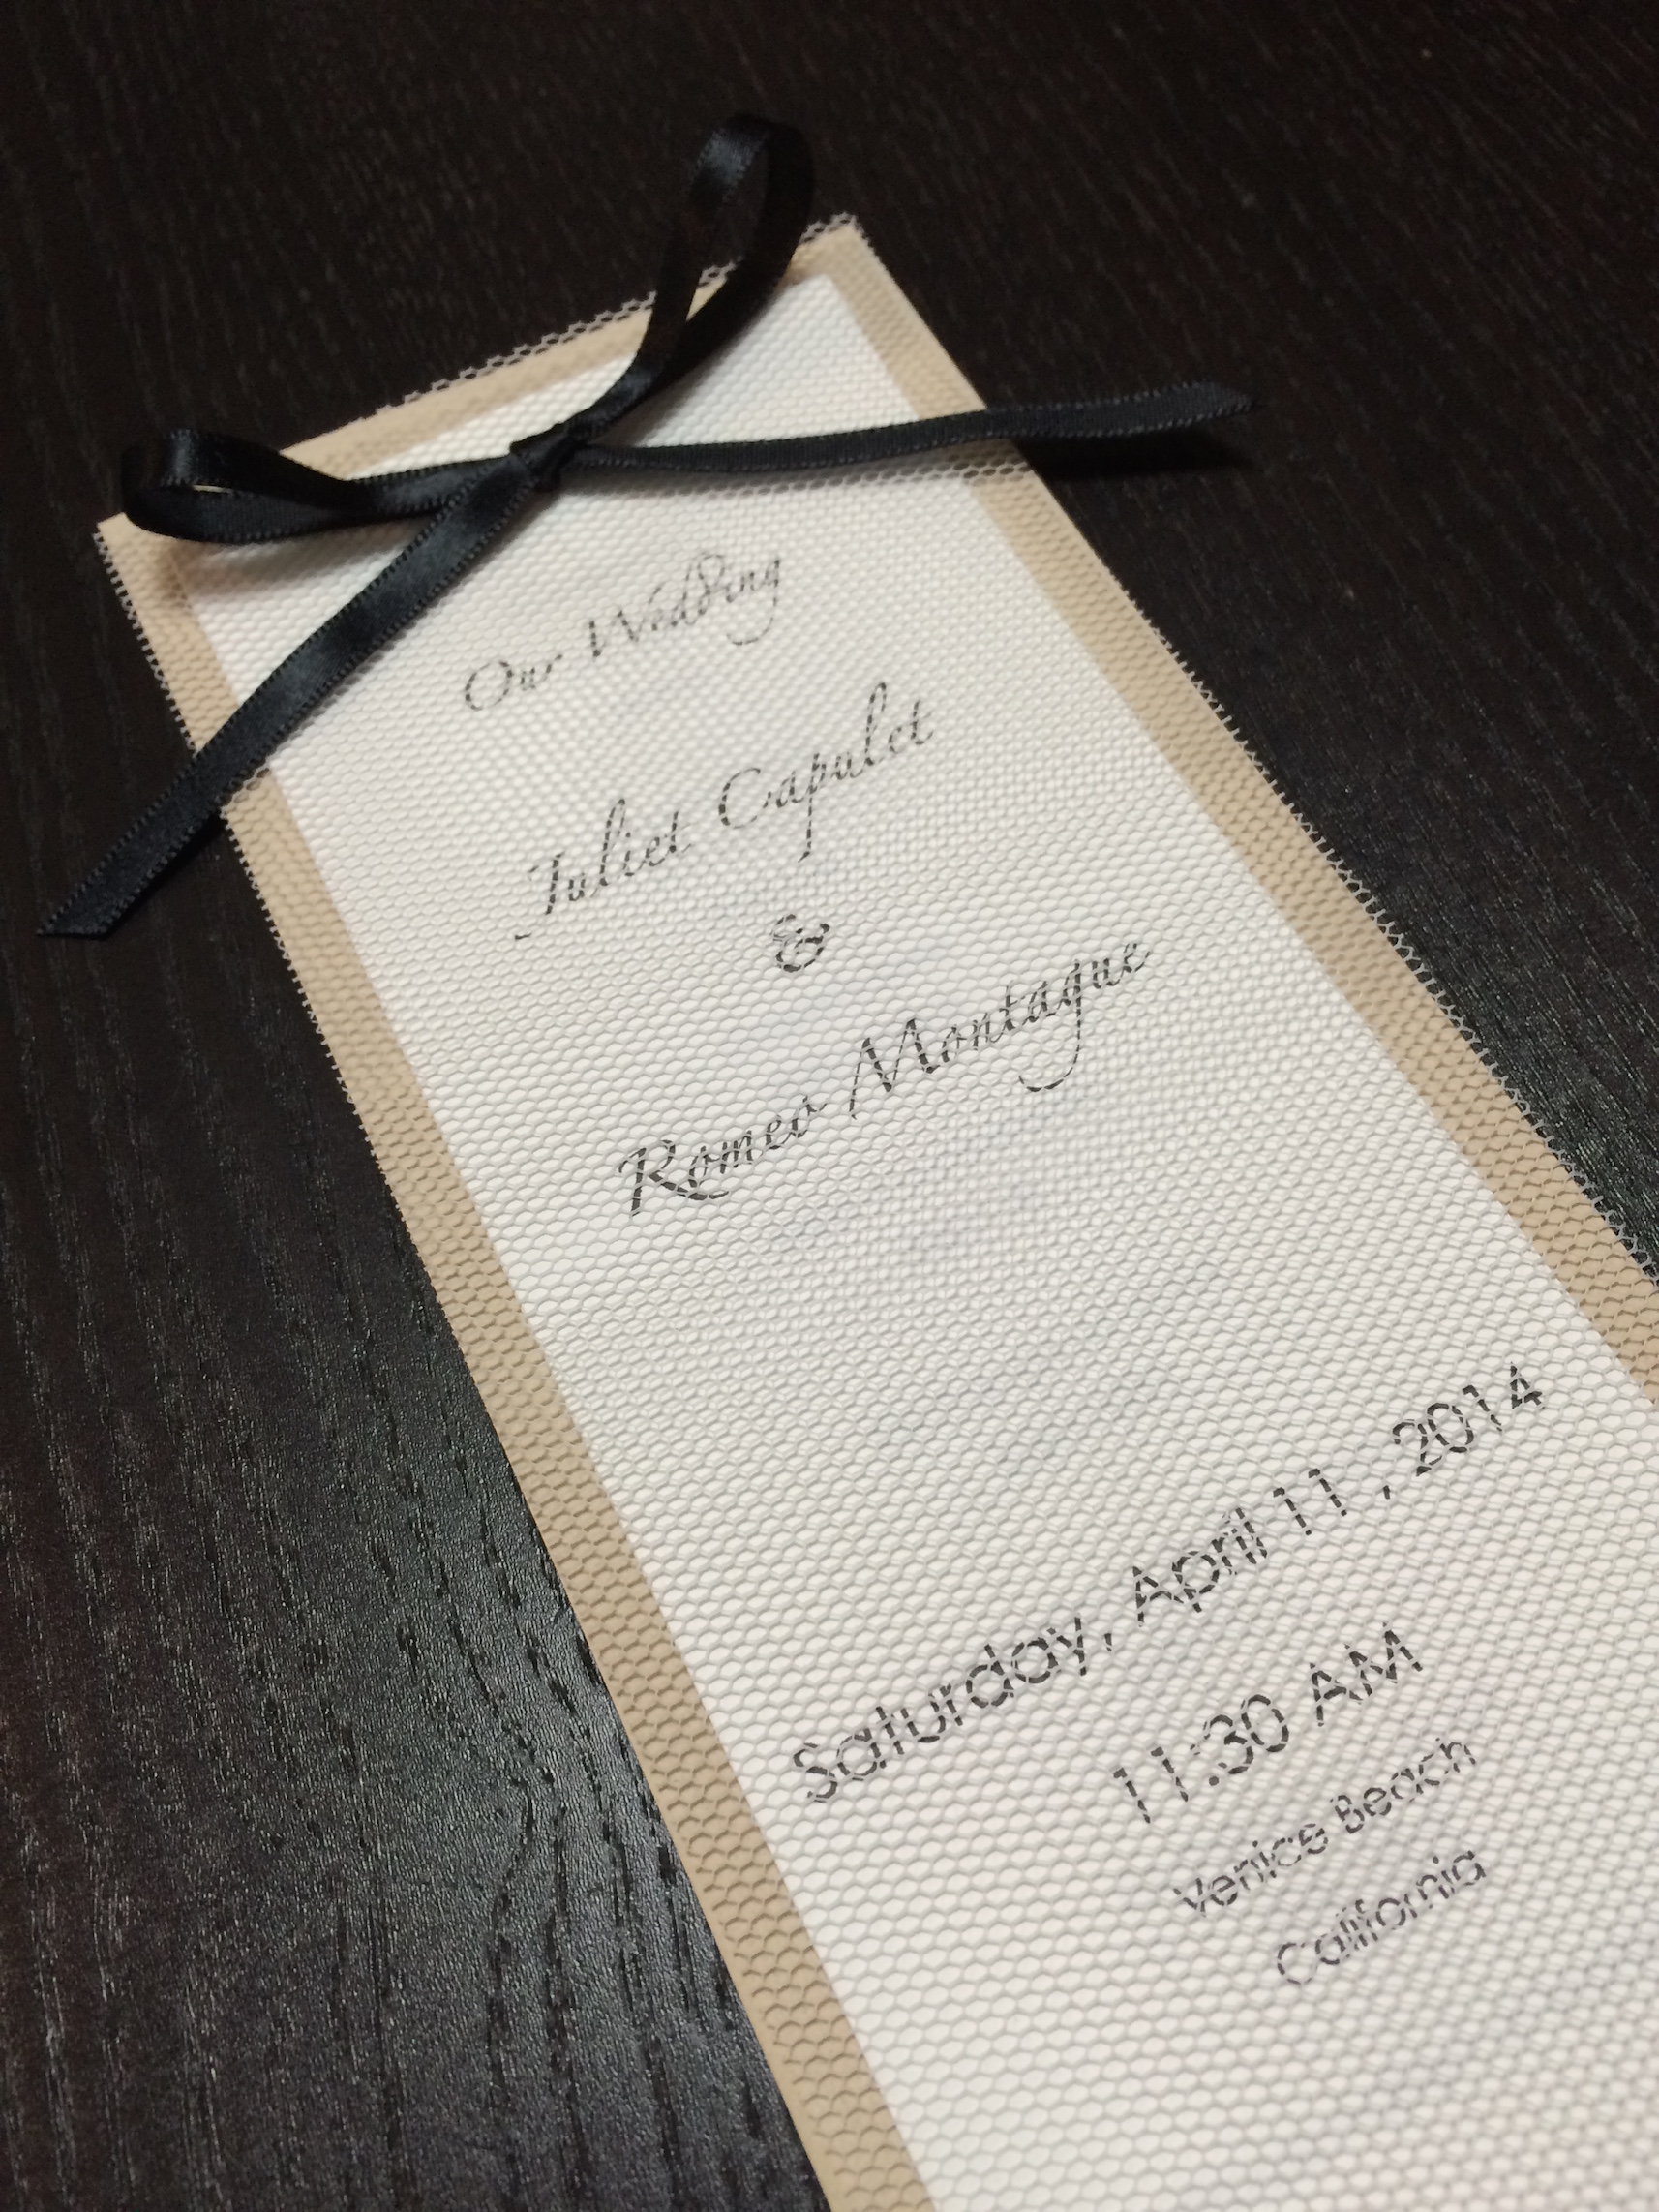
i introduced this “tulle veiled wedding program” on one of my #tbt #fbf posts last month. on this post, i will show you how to make it yourself! i recommend this especially if you’re in your wedding crunch time. to make this program from printing -> cutting the paper and tulle, to tying the ribbon, it took me a total of 30 minutes.
以前に #tbt #fbf の書き込みでこちらの「チュールベールのウェディングプログラム」をご紹介いたしました。今回は、こちらをご自身で作れる d.i.y. をご説明いたします。特にご結婚式の最終段階でお急ぎの場合は特におすすめの d.i.y. です!印刷から紙とチュールの裁断、リボンを結ぶまでかかった時間は30分!

LET’S START! / 始めよう!

what you need / 材料:
any A4 size printing paper / お好みのA4サイズ印刷用紙
card stock (9cm × 22.75cm) / カード紙 (9cm × 22.75cm)
tulle (9cm × 22.75cm) / チュール (9cm × 22.75cm)
scissors / ハサミ
ruler / 定規
hole puncher (i used a 3mm hole, up to 5mm is fine) /
穴あけパンチ (今回は、3mmの穴を使用しましたが、5mmまで可能)
5mm width ribbon (45cm) / 5mm幅リボン (45cm)

[d.i.y.] tulle veiled wedding programs-1
1. create your text on a spreadsheet application using landscape orientation. each individual page should measure 7.5cm × 21cm, which means 3 pages can fit on 1 A4 size page. print.
テキストをスプレッドシートアプリケーションなどを使用して、横向きで作成する。1枚1枚のページサイズが 7.5cm × 21cm になるように、アプリケーション上でA4サイズに3枚のページを横に並べる。印刷する。

[d.i.y.] tulle veiled wedding programs-2
2. card stock should be cut to 9cm × 22.75cm. then, cut A4 size printed text into individual pages measuring to 7.5cm × 21cm.
カード紙は 9cm × 22.75cm にカットし、A4 用紙は 7.5cm × 21cm のページに切り分ける。

[d.i.y.] tulle veiled wedding programs-3
3. cut tulle to the same size as card stock.
チュールはカード紙と同じサイズに合わせて切る。

[d.i.y.] tulle veiled wedding programs-4
4. place tulle and program pages as shown in photo. the top of the pages should be placed 0.6cm away from the edge of the tulle. punch a hole 1cm from the top of the pages and horizontally in the center. if possible, it is more efficient to punch a hole through the pages and tulle all in one go.
プログラムのページとチュールを写真のように重ねる。ページの上端から1cm、横幅の中心位置に穴をあける。可能であれば、チュールと紙をいっぺんに穴あけしますと効率よく、綺麗に仕上がりやすいと思います。

[d.i.y.] tulle veiled wedding programs-5
5. mark and punch two holes in the card stock. 1.7cm away from the top, 3cm apart.
カード紙に穴を2つ開ける。上端から1.7cm、3cm間隔で。

[d.i.y.] tulle veiled wedding programs-6
6. prepare 45cm length ribbon. / 45cmのリボンを用意する。

[d.i.y.] tulle veiled wedding programs-7
7. this is the last step! pull the ribbon evenly through the two holes of the card stock. then pull the ribbon through the single hole of the program pages, then tulle cover.
最後のステップです!カード紙の2つの穴にリボンを通し、続けてページとチュールの1つの穴に通す。

[d.i.y.] tulle veiled wedding programs-8
8. make sure to pull the ribbon all the way through and evenly!
リボンはきつめに引っ張ってカード紙から通したリボンが平行になっていることを確認。

[d.i.y.] tulle veiled wedding programs-9
9. tie the ribbon and voila! / リボンを結んで完成!

FINISHED!